Archive for andrew

Using Maps and Location Data in Your SwiftUI (+Realm) App

Introduction

Embedding Apple Maps and location functionality in SwiftUI apps used to be a bit of a pain. It required writing your own SwiftUI wrapper around UIKit code—see these examples from the O-FISH app:

If you only need to support iOS14 and later, then you can forget most of that messy code 😊. If you need to support iOS13—sorry, you need to go the O-FISH route!

iOS14 introduced the Map SwiftUI view (part of Mapkit) allowing you to embed maps directly into your SwiftUI apps without messy wrapper code.

This article shows you how to embed Apple Maps into your app views using Mapkit’s Map view. We’ll then look at how you can fetch the user’s current location—with their permission, of course!

Finally, we’ll see how to store the location data in Realm in a format that lets MongoDB Realm sync it to MongoDB Atlas. Once in Atlas, you can add a geospatial index and use MongoDB Charts to plot the data on a map—we’ll look at that too.

Most of the code snippets have been extracted from the RChat app. That app is a good place to see maps and location data in action. Building a Mobile Chat App Using Realm – The New and Easier Way is a good place to learn more about the RChat app—including how to enable MongoDB Realm Sync.

Prerequisites

  • Realm-Cocoa 10.8.0+ (may work with some 10.7.X versions)
  • iOS 14.5+ (Mapkit was introduced in iOS 14.0 and so most features should work with earlier iOS 14.X versions)
  • XCode12+

How to Add an Apple Map to Your SwiftUI App

To begin, let’s create a simple view that displays a map, the coordinates of the center of that map, and the zoom level:

Gif of scrolling around an embedded Apple Map and seeing the reported coordinates changing

With Mapkit and SwiftUI, this only takes a few lines of code:

import MapKit
import SwiftUI

struct MyMapView: View {
    @State private var region: MKCoordinateRegion = MKCoordinateRegion(
        center: CLLocationCoordinate2D(latitude: MapDefaults.latitude, longitude: MapDefaults.longitude),
        span: MKCoordinateSpan(latitudeDelta: MapDefaults.zoom, longitudeDelta: MapDefaults.zoom))

    private enum MapDefaults {
        static let latitude = 45.872
        static let longitude = -1.248
        static let zoom = 0.5
    }

    var body: some View {
        VStack {
            Text("lat: \(region.center.latitude), long: \(region.center.longitude). Zoom: \(region.span.latitudeDelta)")
            .font(.caption)
            .padding()
            Map(coordinateRegion: $region,
                interactionModes: .all,
                showsUserLocation: true)
        }
    }
}

Note that showsUserLocation won’t work unless the user has already given the app permission to use their location—we’ll get to that.

region is initialized to a starting location, but it’s updated by the Map view as the user scrolls and zooms in and out.

Adding Bells and Whistles to Your Maps (Pins at Least)

Pins can be added to a map in the form of “annotations.” Let’s start with a single pin:

Embedded Apple Map showing a red pin

Annotations are provided as an array of structs where each instance must contain the coordinates of the pin. The struct must also conform to the Identifiable protocol:

struct MyAnnotationItem: Identifiable {
    var coordinate: CLLocationCoordinate2D
    let id = UUID()
}

We can now create an array of MyAnnotationItem structs:

let annotationItems = [
    MyAnnotationItem(coordinate: CLLocationCoordinate2D(
        latitude: MapDefaults.latitude,
        longitude: MapDefaults.longitude))]

We then pass annotationItems to the MapView and indicate that we want a MapMarker at the contained coordinates:

Map(coordinateRegion: $region,
    interactionModes: .all,
    showsUserLocation: true,
    annotationItems: annotationItems) { item in
        MapMarker(coordinate: item.coordinate)
    }

That gives us the result we wanted.

What if we want multiple pins? Not a problem. Just add more MyAnnotationItem instances to the array.

All of the pins will be the same default color. But, what if we want different colored pins? It’s simple to extend our code to produce this:

Embedded Apple Map showing red, yellow, and plue pins at different locations

Firstly, we need to extend MyAnnotationItem to include an optional color and a tint that returns color if it’s been defined and “red” if not:

struct MyAnnotationItem: Identifiable {
    var coordinate: CLLocationCoordinate2D
    var color: Color?
    var tint: Color { color ?? .red }
    let id = UUID()
}

In our sample data, we can now choose to provide a color for each annotation:

let annotationItems = [
    MyAnnotationItem(
        coordinate: CLLocationCoordinate2D(
            latitude: MapDefaults.latitude,
            longitude: MapDefaults.longitude)),
    MyAnnotationItem(
        coordinate: CLLocationCoordinate2D(
            latitude: 45.8827419,
            longitude: -1.1932383),
        color: .yellow),
    MyAnnotationItem(
        coordinate: CLLocationCoordinate2D(
            latitude: 45.915737,
            longitude: -1.3300991),
        color: .blue)
]

The MapView can then use the tint:

Map(coordinateRegion: $region,
    interactionModes: .all,
    showsUserLocation: true,
    annotationItems: annotationItems) { item in
    MapMarker(
        coordinate: item.coordinate,
        tint: item.tint)
}

If you get bored of pins, you can use MapAnnotation to use any view you like for your annotations:

Map(coordinateRegion: $region,
    interactionModes: .all,
    showsUserLocation: true,
    annotationItems: annotationItems) { item in
    MapAnnotation(coordinate: item.coordinate) {
        Image(systemName: "gamecontroller.fill")
            .foregroundColor(item.tint)
    }
}

This is the result:

Apple Map showing red, yellow and blue game controller icons at different locations on the map

You could also include the name of the system image to use with each annotation.

This gist contains the final code for the view.

Finding Your User’s Location

Asking for Permission

Apple is pretty vocal about respecting the privacy of their users, and so it shouldn’t be a shock that your app will have to request permission before being able to access a user’s location.

The first step is to add a key-value pair to your Xcode project to indicate that the app may request permission to access the user’s location, and what text should be displayed in the alert. You can add the pair to the “Info.plist” file:

Privacy - Location When In Use Usage Description : We'll only use your location when you ask to include it in a message

Screenshot from Xcode showing the key-value pair for requesting permission for the app to access the user's location

Once that setting has been added, the user should see an alert the first time that the app attempts to access their current location:

iPhone screenshot – app is requesting permission to access the user's location

Accessing Current Location

While Mapkit has made maps simple and native in SwiftUI, the same can’t be said for location data.

You need to create a SwiftUI wrapper for Apple’s Core Location functionality. There’s not a lot of value in explaining this boilerplate code—just copy this code from RChat’s LocationHelper.swift file, and paste it into your app:

import CoreLocation

class LocationHelper: NSObject, ObservableObject {

    static let shared = LocationHelper()
    static let DefaultLocation = CLLocationCoordinate2D(latitude: 45.8827419, longitude: -1.1932383)

    static var currentLocation: CLLocationCoordinate2D {
        guard let location = shared.locationManager.location else {
            return DefaultLocation
        }
        return location.coordinate
    }

    private let locationManager = CLLocationManager()

    private override init() {
        super.init()
        locationManager.delegate = self
        locationManager.desiredAccuracy = kCLLocationAccuracyBest
        locationManager.requestWhenInUseAuthorization()
        locationManager.startUpdatingLocation()
    }
}

extension LocationHelper: CLLocationManagerDelegate {
    func locationManager(_ manager: CLLocationManager, didUpdateLocations locations: [CLLocation]) { }

    public func locationManager(_ manager: CLLocationManager, didFailWithError error: Error) {
        print("Location manager failed with error: \(error.localizedDescription)")
    }

    public func locationManager(_ manager: CLLocationManager, didChangeAuthorization status: CLAuthorizationStatus) {
        print("Location manager changed the status: \(status)")
    }
}

Once added, you can access the user’s location with this simple call:

let location = LocationHelper.currentLocation

Store Location Data in Your Realm Database

The Location Format Expected by MongoDB

Realm doesn’t have a native type for a geographic location, and so it’s up to us how we choose to store it in a Realm Object. That is, unless we want to synchronize the data to MongoDB Atlas using MongoDB Realm Sync, and go on to use MongoDB’s geospatial functionality.

To make the best use of the location data in Atlas, we need to add a geospatial index to the field (which we’ll see how to do soon.) That means storing the location in a supported format. Not all options will work with Realm Sync (e.g., it’s not guaranteed that attributes will appear in the same order in your Realm Object and the synced Atlas document). The most robust approach is to use an array where the first element is longitude and the second is latitude:

location: [<longitude>, <latitude>]

Your Realm Object

The RChat app gives users the option to include their location in a chat message—this means that we need to include the location in the ChatMessage Object:

@objcMembers class ChatMessage: Object, ObjectKeyIdentifiable {
  …
    let location = List<Double>()
  …
    convenience init(author: String, text: String, image: Photo?, location: [Double] = []) {
        ...
    location.forEach { coord in
            self.location.append(coord)
      }
        ...
        }
    }
   ….
}

The location array that’s passed to that initializer is formed like this:

let location = LocationHelper.currentLocation
self.location = [location.longitude, location.latitude]

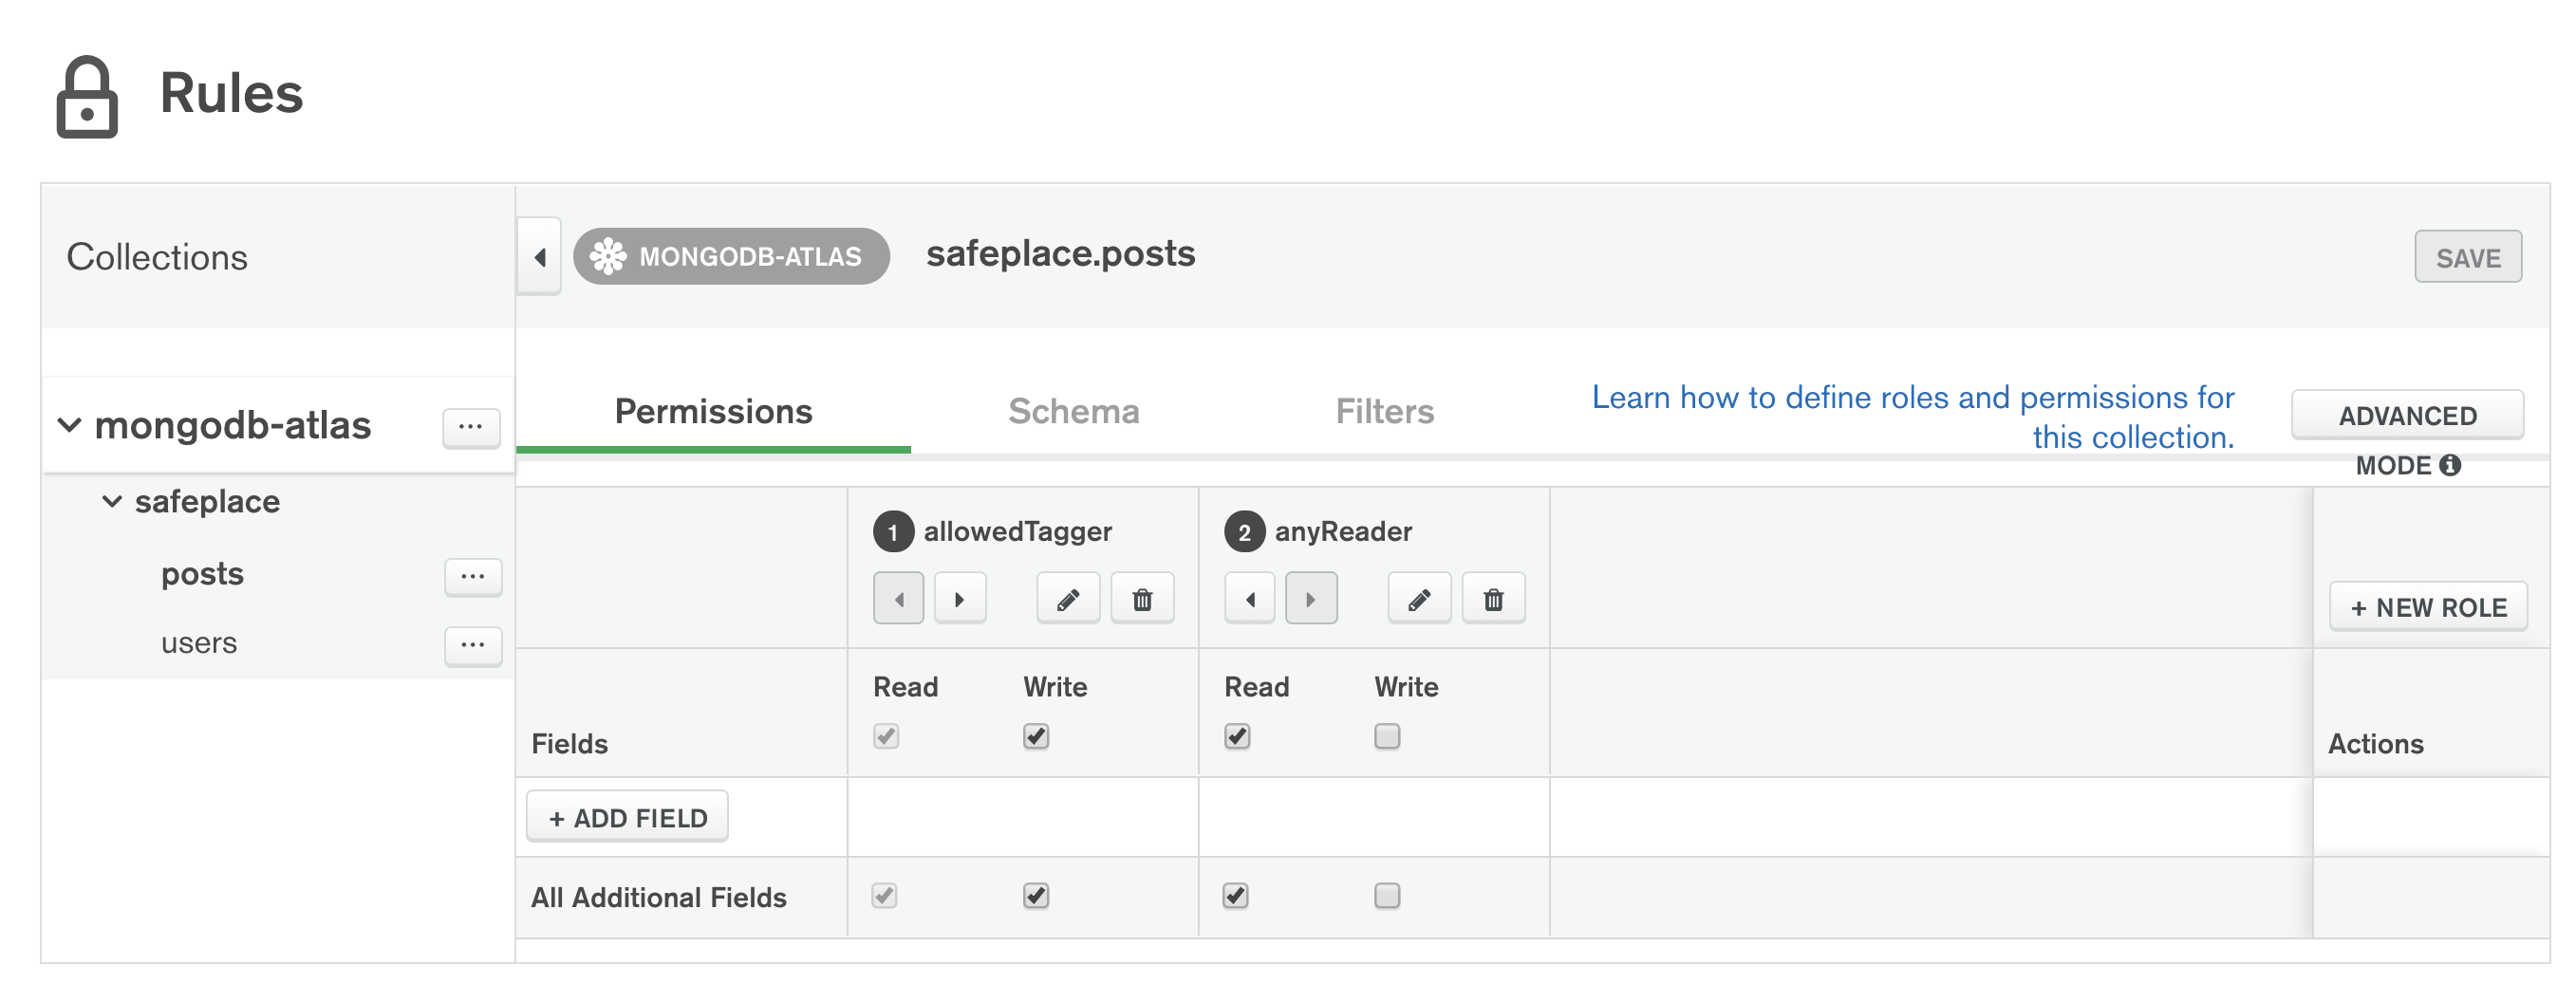
Location Data in Your Backend MongoDB Realm App

The easiest way to create your backend MongoDB Realm schema is to enable Development Mode—that way, the schema is automatically generated from your Swift Realm Objects.

This is the generated schema for our “ChatMessage” collection:

{
    "bsonType": "object",
    "properties": {
      "_id": {
        "bsonType": "string"
      },
      ...
      "location": {
        "bsonType": "array",
        "items": {
          "bsonType": "double"
        }
      }
    },
    "required": [
      "_id",
      ...
    ],
    "title": "ChatMessage"
}

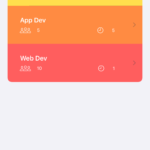
This is a document that’s been created from a synced Realm ChatMessage object:

Screen capture of an Atlas document, which includes an array named location

Adding a Geospatial Index in Atlas

Now that you have location data stored in Atlas, it would be nice to be able to work with it—e.g., running geospatial queries. To enable this, you need to add a geospatial index to the location field.

From the Atlas UI, select the “Indexes” tab for your collection and click “CREATE INDEX”:

Atlas screen capture of creating a new index

You should then configure a 2dsphere index:

Atlas screen capture of creating a new 2dsphere index

Most chat messages won’t include the user’s location and so I set the sparse option for efficiency.

Note that you’ll get an error message if your ChatMessage collection contains any documents where the value in the location attribute isn’t in a valid geospatial format.

Atlas will then build the index. This will be very quick, unless you already have a huge number of documents containing the location field. Once complete, you can move onto the next section.

Plotting Your Location Data in MongoDB Charts

MongoDB Charts is a simple way to visualize MongoDB data. You can access it through the same UI as Realm and Atlas. Just click on the “Charts” button:

Atlas screen capture of MongoDB Charts button

The first step is to click the “Add Data Source” button:

Charts screen capture of adding a new data source

Select your Atlas cluster:

Charts screen capture of adding Atlas cluster as a data source

Select the RChat.ChatMessage collection:

Charts screen capture of selecting the ChatMessage collection in the RChat database

Click “Finish.” You’ll be taken to the default Dashboards view, which is empty for now. Click “Add Dashboard”:

Charts screen capture of adding a new dashboard

In your new dashboard, click “ADD CHART”:

Charts screen capture of adding a new chart

Configure your chart as shown here by:
– Setting the chart type to “Geospatial” and the sub-type to “Scatter.”
– Dragging the “location” attribute to the coordinates box.
– Dragging the “author” field to the “Color” box.

Charts screen capture of configuring a new chart

Once you’ve created your chart, you can embed it in web apps, etc. That’s beyond the scope of this article, but check out the MongoDB Charts docs if you’re interested.

Conclusion

SwiftUI makes it easy to embed Apple Maps in your SwiftUI apps. As with most Apple frameworks, there are extra maps features available if you break out from SwiftUI, but I’d suggest that the simplicity of working with SwiftUI is enough incentive for you to avoid that unless you have a compelling reason.

Accessing location information from within SwiftUI still feels a bit of a hack, but in reality, you cut and paste the helper code once, and then you’re good to go.

By storing the location as a [longitude, latitude] array (List) in your Realm database, it’s simple to sync it with MongoDB Atlas. Once in Atlas, you have the full power of MongoDB’s geospatial functionality to work your location data.

If you have questions, please head to our developer community website where the MongoDB engineers and the MongoDB community will help you build your next big idea with MongoDB.


Migrating a SwiftUI iOS App from Core Data to Realm

I’ve just released a new article—Migrating a SwiftUI iOS App from Core Data to Realm.

Porting an app that’s using Core Data to Realm is very simple. If you have an app that already uses Core Data, and have been considering the move to Realm, this step-by-step guide is for you! The way that your code interacts with Core Data and Realm is very different depending on whether your app is based on SwiftUI or UIKit—this guide assumes SwiftUI (a UIKit version will come soon.)

You’re far from the first developer to port your app from Core Data to Realm, and we’ve been told many times that it can be done in a matter of hours. Both databases handle your data as objects, so migration is usually very straightforward: Simply take your existing Core Data code and refactor it to use the Realm SDK.

After migrating, you should be thrilled with the ease of use, speed, and stability that Realm can bring to your apps. Add in MongoDB Realm Sync and you can share the same data between iOS, Android, desktop, and web apps.


Realm Partitioning Strategies

I’ve just released a new article – Realm Partitioning Strategies.

Realm partitioning can be used to control what data is synced to each mobile device, ensuring that your app is efficient, performant and secure. This article will help you pick the right partitioning strategy for your app.

MongoDB Realm Sync stores the superset of your application data in the cloud using MongoDB Atlas. The simplest strategy is that every instance of your mobile app contains the full database, but that quickly consumes a lot of space on the users’ devices and makes the app slow to start while it syncs all of the data for the first time.
Alternative strategies include partitioning by:

  • User
  • Group/team/store
  • Chanel/room/topic
  • Geographic region
  • Bucket of time
  • Any combination of these

The article discusses all of those strategies so that you adopt one, or craft a different strategy that’s customized to your app’s needs.


New article on migrating Apple’s Scrumdinger tutorial app to Realm

Apple published a great tutorial to teach developers how to create iOS apps using Swift and SwiftUI. I particularly like it because it doesn’t make any assumptions about existing UIKit experience, making it ideal for developers new to iOS. That tutorial is built around an app named “Scrumdinger,” which is designed to facilitate daily scrum meetings. Apple’s Scrumdinger implementation saves the app data to a local file whenever the user minimizes the app, and loads it again when they open the app. It seemed an interesting exercise to modify Scrumdinger to use Realm rather than a flat file to persist the data. So. I wrote “Adapting Apple’s Scrumdinger SwiftUI Tutorial App to Use Realm” to step through what changes were required to rebase Scrumdinger onto Realm. An immediate benefit of the move is that changes are now persisted immediately, so nothing is lost if the device or app crashes. It’s beyond the scope of this article, but now that the app data is stored in Realm, it would be straightforward to add enhancements such as:
  • Search meeting minutes for a string.- Filter minutes by date or attendees.
  • Sync data so that the same user can see all of their data on multiple iOS (and optionally, Android) devices.
  • Use Realm Sync Partitions to share scrum data between team members.
  • Sync the data to MongoDB Atlas so that it can be accessed by web apps or through a GraphQL API


Accessing Realm Data on iOS using Realm Studio

The Realm Mobile Database makes it much faster to develop mobile applications. MongoDB Realm Studio is a desktop GUI that lets you view, manipulate, and import data held within your mobile app’s Realm database. I’ve just published a new article (Accessing Realm Data on iOS using Realm Studio) which steps through how to track down the locations of your iOS Realm database files, open them in Realm Studio, view the data, and make changes.


Integrate Your Realm App with Amazon EventBridge

I’ve just co-written an article with AWS stepping through extending a Realm chat app to send messages to a Slack channel using Amazon EventBridge. Realm makes it easy to develop compelling mobile applications backed by a serverless MongoDB Realm back end and the MongoDB Atlas database service. You can enrich those applications by integrating with AWS’s broad ecosystem of services. In that article, I show you how to configure Realm and AWS to turn Atlas database changes into Amazon EventBridge events – all without adding a single line of code. Once in EventBridge, you can route events to other services which can act on them.


Building a Mobile Chat App Using Realm – Integrating with Realm

I’ve just completed an article on how to integrate Realm and Realm Sync into an iOS chat app. It was timed to coincide with the GA of MongoDB Realm Sync.
Realm is used for both persisting data on the iOS device and synchronizing the data between instances of the mobile app.
The app is currently iOS-only (using SwiftUI), but we plan on building an Android version soon. One of the nice things about Realm Sync is that there’s no extra work needed to map between operating systems and languages when syncing data between iOS and Android.
That data is also synced to MongoDB Atlas and so can be accessed from web or other kinds of apps too.
The data stored and synced covers everything in the app:
  • User profile
  • User presence
  • Lists of chatrooms and members
  • The messages themselves
You can download all of the code from the GitHub repo.
Checkout Building a Mobile Chat App Using Realm – Integrating Realm into Your App for all of the details.
Also, if you want to learn more about how the app was built and ask some questions then I’ll be speaking at a virtual meetup on 17th Feb.


Building a Mobile Chat App Using Realm – Data Architecture

I’ve just built an iOS chat app using SwiftUI, Realm, and Realm Sync. I decided on a chat app as it makes an interesting case study for designing a data model and controlling who can access what data:

  • A chat message needs to be viewable by all members of a chat room and no one else.
  • New messages must be pushed to the chat room for all online members in real-time.
  • The app should notify a user that there are new messages even when they don’t have that chat room open.
  • Users should be able to observe the “presence” of other users (e.g., whether they’re currently logged into the app).
  • There’s no limit on how many messages users send in a chat room, and so the data structures must allow them to grow indefinitely.

Because this app’s data model (and the decisions taken when designing) serve as a great starting point for many different types of apps, I wrote it up in this HowTo article.

You can download all of the code from the GitHub repo.

Checkout Building a Mobile Chat App Using Realm – Data Architecture for all of the details.


Building an iOS app with Realm, SwiftUI, & Combine

I’m relatively new to building iOS apps (a little over a year’s experience), and so I prefer using the latest technologies that make me a more productive developer. That means my preferred app stack looks like this:
In 🔥 Out ❄️
Swift Objective C
SwiftUI UIKit
Combine RxSwift
Realm Core Data
MongoDB Realm Sync (where needed) Home-baked cross-platform data sync
I built a simple, distributed task management app on that stack, and wrote it up in “Build Your First iOS Mobile App Using Realm, SwiftUI, & Combine”. To continue my theme on being productive, I borrowed heavily from MongoDB’s official iOS Swift tutorial: You can download all of the code for the front end app from the GitHub repo. Checkout Build Your First iOS Mobile App Using Realm, SwiftUI, & Combine for all of the details.


How to create Dynamic Custom Roles with MongoDB Stitch

None of us want to write lots of code to control what data each user can access. In most cases, you can set up your data access controls in seconds by using Stitch’s built-in templates, e.g., “Users can read and write their own data” or “Users can read and write their own data. Users that belong to a sharing list can read that data”. Stitch also lets you create custom roles that you tailor to your application and schema – this post creates such a rule, querying a second collection when deciding whether to allow a user to insert a document.

The application is a troll-free timeline where you can only tag another user in a post if that user has labeled you as a trusted friend. I’ve already created a database called safeplace for the collections.

The users collection includes a list of usernames for their trusted friends (peopleWhoCanTagMe):

{
    "_id" : ObjectId("5c9273127558d01d93f53dc0"),
    "username" : "alovelace",
    "name" : {
        "first" : "Ada",
        "last" : "Lovelace"
    },
    "peopleWhoCanTagMe" : [
        "jeckert",
        "jmauchly"
    ]
}

You then need to create a data access rule for the posts collection, consisting of 2 roles, which Stitch evaluates in sequence:

Creating custom roles for Stitch data access control rules

The second, anyReader, role lets anyone read any post, but the role we care about is allowedTagger which controls what the application can write to the collection.

The allowedTagger role is defined using this JSON expression:

{
  "%%true": {
    "%function": {
      "name": "canTheyTag",
      "arguments": [
        "%%root.poster",
        "%%root.tagged"
      ]
    }
  }
}

%%root represents the document that the user is attempting to insert. The poster and tagged attributes of the document to be written are the usernames of the author and their claimed friend. The JSON expression passes them as parameters to a Stitch function named canTheyTag:

exports = function(poster, tagged){
  var collection = context.services.get("mongodb-atlas")
    .db("safeplace").collection("users");
  return collection.findOne({username: tagged})
  .then ( userDoc => { 
    return (userDoc.peopleWhoCanTagMe.indexOf(poster) > -1);
  }).catch( e => { console.log(e); return false; }); 
};

This searches the users collection for the tagged user and then checks that the poster’s username appears in the peopleWhoCanTagMe array in the retrieved document.

You can test this new rule using the mongo shell (courtesy of Stitch’s MongoDB Connection String feature). Initially, I’m not included in Ada’s list of friends and so trying to tag her in a post fails:

db.posts.insert({ 
    poster: "amorgan", 
    tagged: "alovelace", 
    post: "Just sent you a pull request" })

WriteCommandError({ "ok" : 0, "errmsg" : "insert not permitted" })

The logs show that the insert didn’t match our customer role but that it did match the second (anyReader), but that inserts aren’t allowed for that role:

Logs:
[
  "uncaught promise rejection: StitchError: insert not permitted"
]
Error:
role anyReader does not have insert permission
Stack Trace:
StitchError: insert not permitted
{
  "name": "insertOne",
  "service": "mongodb-atlas"
}
Compute Used: 936719 bytes•ms

Ada then adds me as a trusted friend:

db.users.update(
    {username: "alovelace"}, 
    {$push: {peopleWhoCanTagMe: "amorgan"}}
)

My second attempt to tag her in a post succeeds:

db.posts.insert({
    poster: "amorgan", 
    tagged: "alovelace", 
    post: "Just sent you a pull request" })

WriteResult({ "nInserted" : 1 })

I recently had someone ask me how to implement “traditional database roles” using Stitch, i.e. an administrator explicitly defines which user ids belong to a specific role, and then use that role to determine whether they can access a collection. You can use this same approach for that use case – have a collection that assigns users to roles and then find the user id in that collection from a Stitch function that’s used in roles for the collections you want to protect. You could then optimize the rules by including the users’ roles as an attribute in their authentication token – but I’ll save that for a future post!