Developers love working with MongoDB. One reason is the flexible data model, another is that there’s an idiomatic driver for just about every programming language and someone’s probably already built a framework on top of MongoDB that takes care of a lot of the grunt work. With high availability and scaling built in, they can also be confident that MongoDB will continue to meet their needs as their business grows.
MongoDB Atlas provides all of the features of MongoDB, without the operational heavy lifting required for any new application. MongoDB Atlas is available on demand through a pay-as-you-go model and billed on an hourly basis, letting you focus on what you do best.
It’s easy to get started – use a simple GUI to select the instance size, region, and features you need (Figure 1).
Figure 1: Create MongoDB Atlas Cluster
MongoDB Atlas provides:
- Security features to protect access to your data
- Built in replication for always-on availability, tolerating complete data center failure
- Backups and point in time recovery to protect against data corruption
- Fine-grained monitoring to let you know when to scale. Additional instances can be provisioned with the push of a button
- Automated patching and one-click upgrades for new major versions of the database, enabling you to take advantage of the latest and greatest MongoDB features
- A choice of cloud providers, regions, and billing options
This post provides instructions on how to use MongoDB Atlas directly from your application or how to configure your favorite framework to use it. It goes on to provide links to some worked examples for specific frameworks.
Worked Examples for Specific Frameworks
Detailed walkthroughs are available for specific programming languages and frameworks:
- Using PencilBlue with MongoDB Atlas (JavaScript, Node.js)
- Develop & Deploy a Node.js App to AWS Elastic Beanstalk & MongoDB Atlas (JavaScript, Node.js, Express, AWS Elastic Beanstalk)
- Processing Data Streams with Amazon Kinesis and MongoDB Atlas (Amazon Kinesis, JavaScript, Node.js)
- MongoDB Atlas as The Data Store for Apostrophe (JavaScript, Node.js)
- Configuring KeystoneJS to Use MongoDB Atlas (JavaSript, Express, Node.js)
- Getting Started with Python, PyMODM, and MongoDB Atlas (Python, PyMODM)
- MongoDB Atlas with Meteor: A Step-By-Step Guide External site (Meteor, JavaScript, Angular, React
This list will be extended as new blog posts are produced. If your preferred language or framework isn’t listed above then read on as the following, generic instructions cover most other cases.
Preparing MongoDB Atlas For Your Application
Launch your MongoDB cluster using MongoDB Atlas and then (optionally) create a user with read and write privileges for just the database that will be used for your application, as shown in Figure 2.
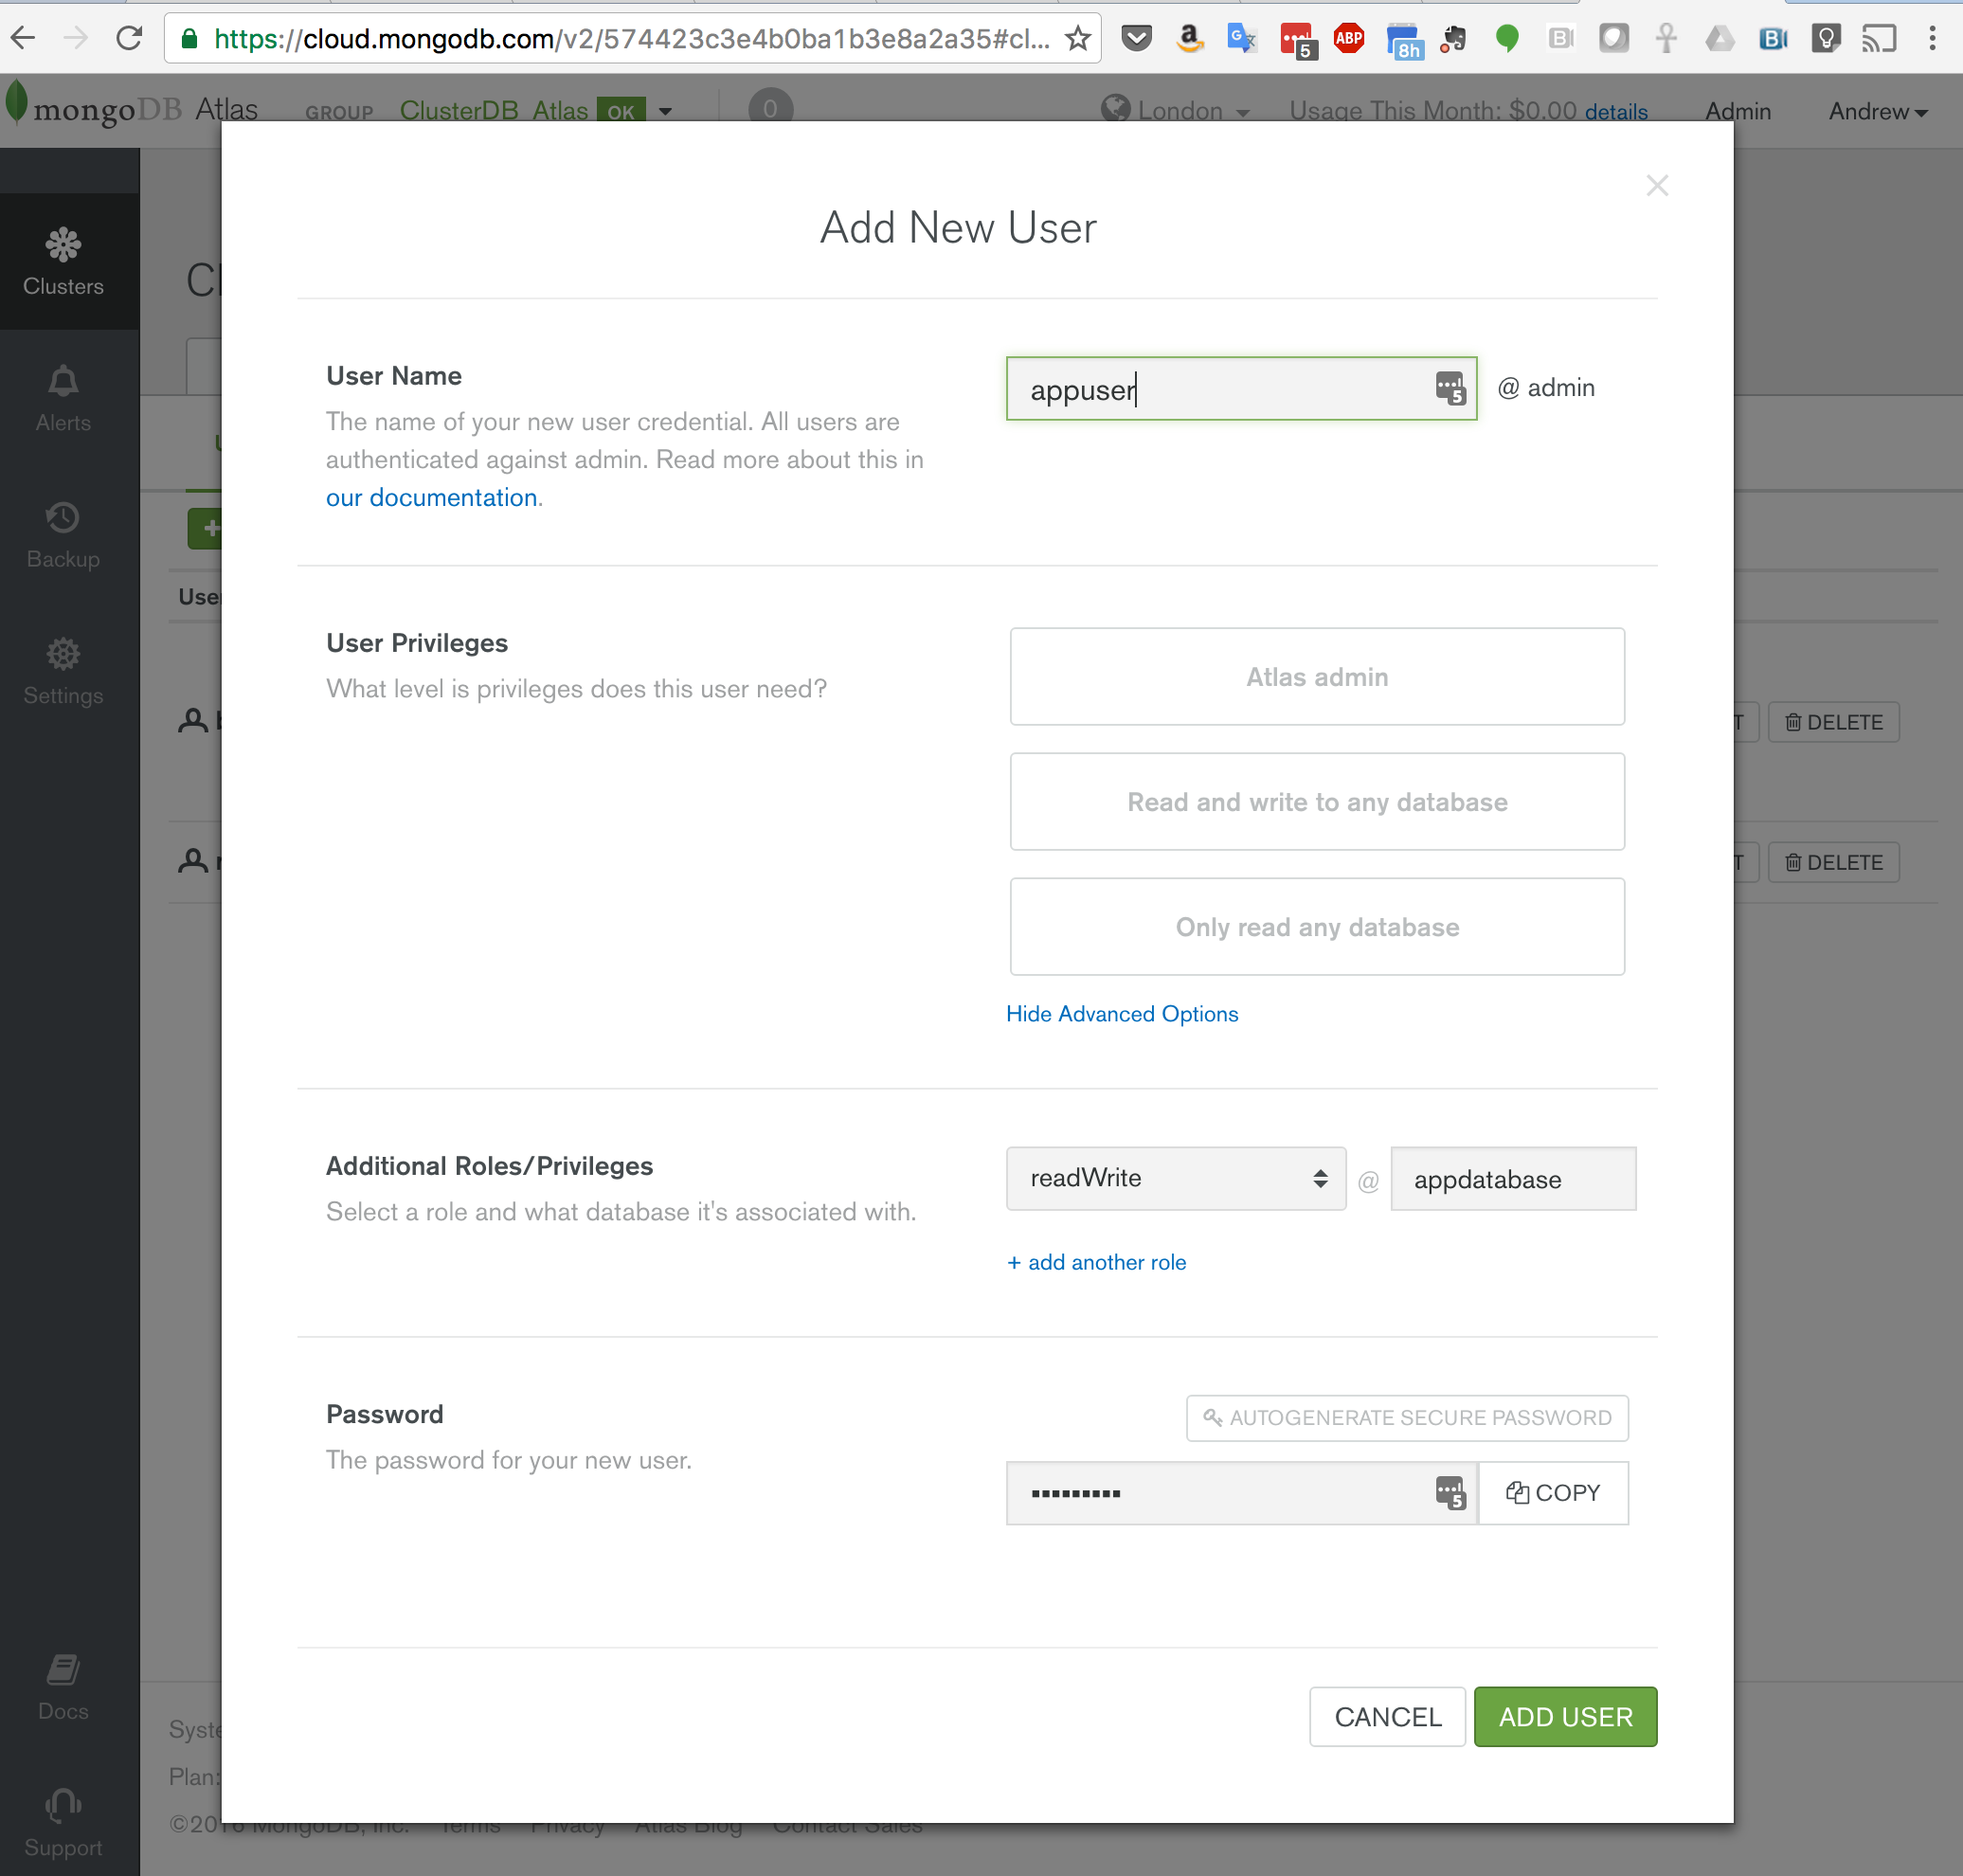
Figure 2: Creating an Application user in MongoDB Atlas
You must also add the IP address of your application server to the IP Whitelist in the MongoDB Atlas security tab (Figure 3). Note that if multiple application servers will be accessing MongoDB Atlas then an IP address range can be specified in CIDR format (IP Address/number of significant bits).

Figure 3: Add App Server IP Address(es) to MongoDB Atlas
Connecting Your Application (Framework) to MongoDB Atlas
The exact way that you specify how to connect to MongoDB Atlas will vary depending on your programming language and (optionally) the framework you’re using. However it’s pretty universal that you’ll need to provide a connection string/URI. The core of this URI can be retrieved by clicking on the CONNECT button for your cluster in the MongoDB Atlas GUI, selecting the MongoDB Drivers tab and then copying the string (Figure 4).

Figure 4: Copy MongoDB Atlas Connection String/URI
Note that this URI contains the administrator username for your MongoDB Atlas group and will connect to the admin database – you’ll probably want to change that.
Your final URI should look something like this:
mongodb://appuser:my_password@cluster0-shard-00-00-qfovx.mongodb.net:27017,cluster0-shard-00-01-qfovx.mongodb.net:27017,cluster0-shard-00-02-qfovx.mongodb.net:27017/appdatabase?ssl=true&authSource=admin'
The URI contains these components:
- appuser is the name of the user you created in the MongoDB Atlas UI.
- my_password is the password you chose when creating the user in MongoDB Atlas.
- cluster0-shard-00-00-qfovx.mongodb.net, cluster0-shard-00-01-qfovx.mongodb.net, & cluster0-shard-00-02-qfovx.mongodb.net are the hostnames of the instances in your MongoDB Atlas replica set (click on the “CONNECT” button in the MongoDB Atlas UI if you don’t have these).
- 27017 is the standard MongoDB port number.
- appdatabase is the name of the database (schema) that your application or framework will use. Note that for some frameworks, this should be omitted and the database name configured separately – check the default configuration file or documentation for your framework to see if it’s possible to provide the database name outside of the URI.
- To enforce security, MongoDB Atlas mandates that the ssl option is used.
- admin is the database that’s being used to store the credentials for appuser.
Check Your Application Data
At this point, you should add some test data through your application and then confirm that it’s being correctly stored in MongoDB Atlas.
MongoDB Compass is the GUI for MongoDB, allowing you to visually explore your data and interact with your data with full CRUD functionality. The same credentials can be used to connect Compass to your MongoDB database (Figure 5).
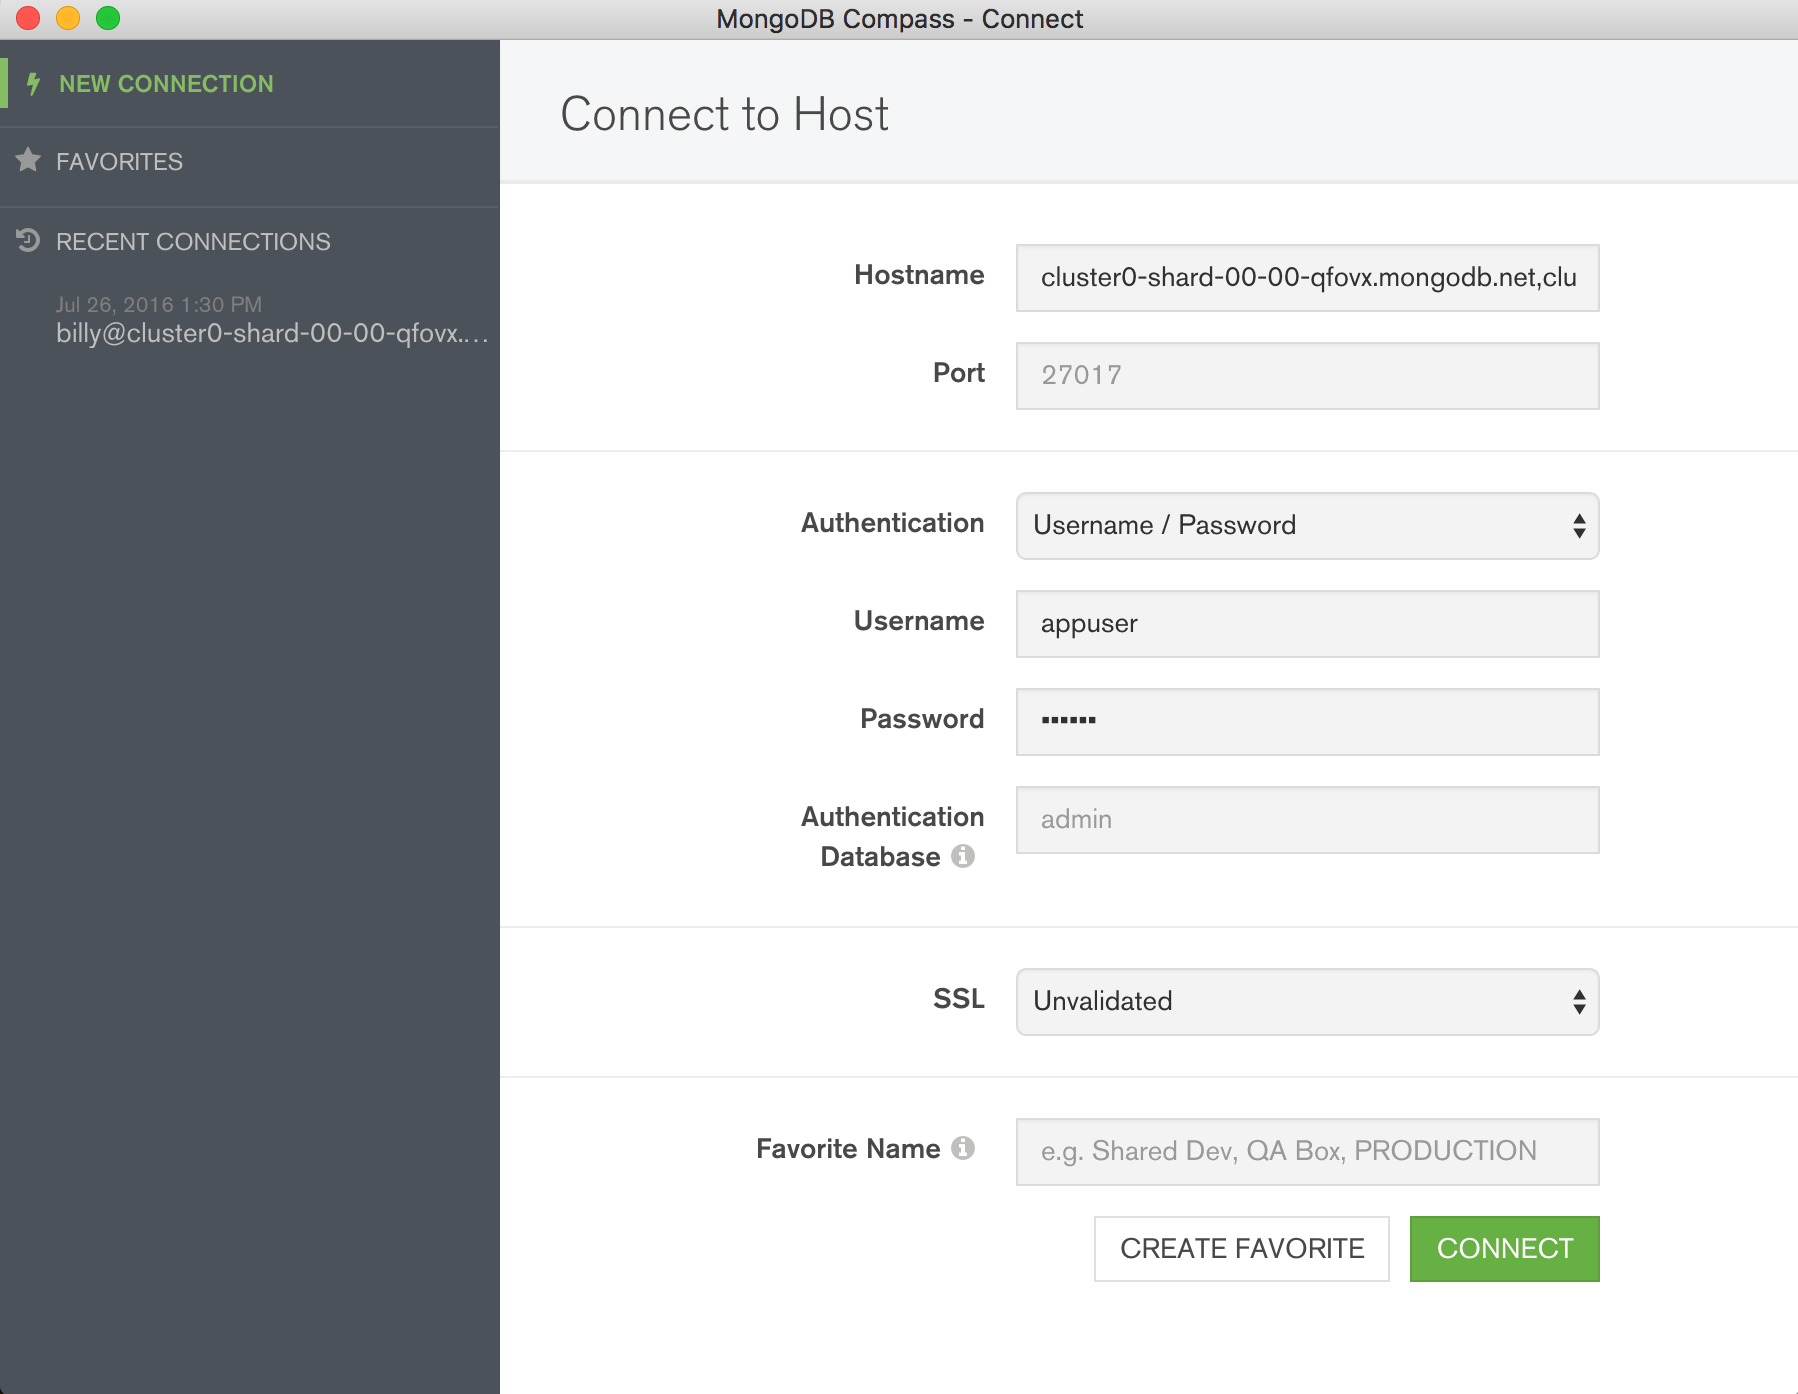
Figure 5: Connect MongoDB Compass to MongoDB Atlas
Once connected, explore the data added to your collections (Figure 6).
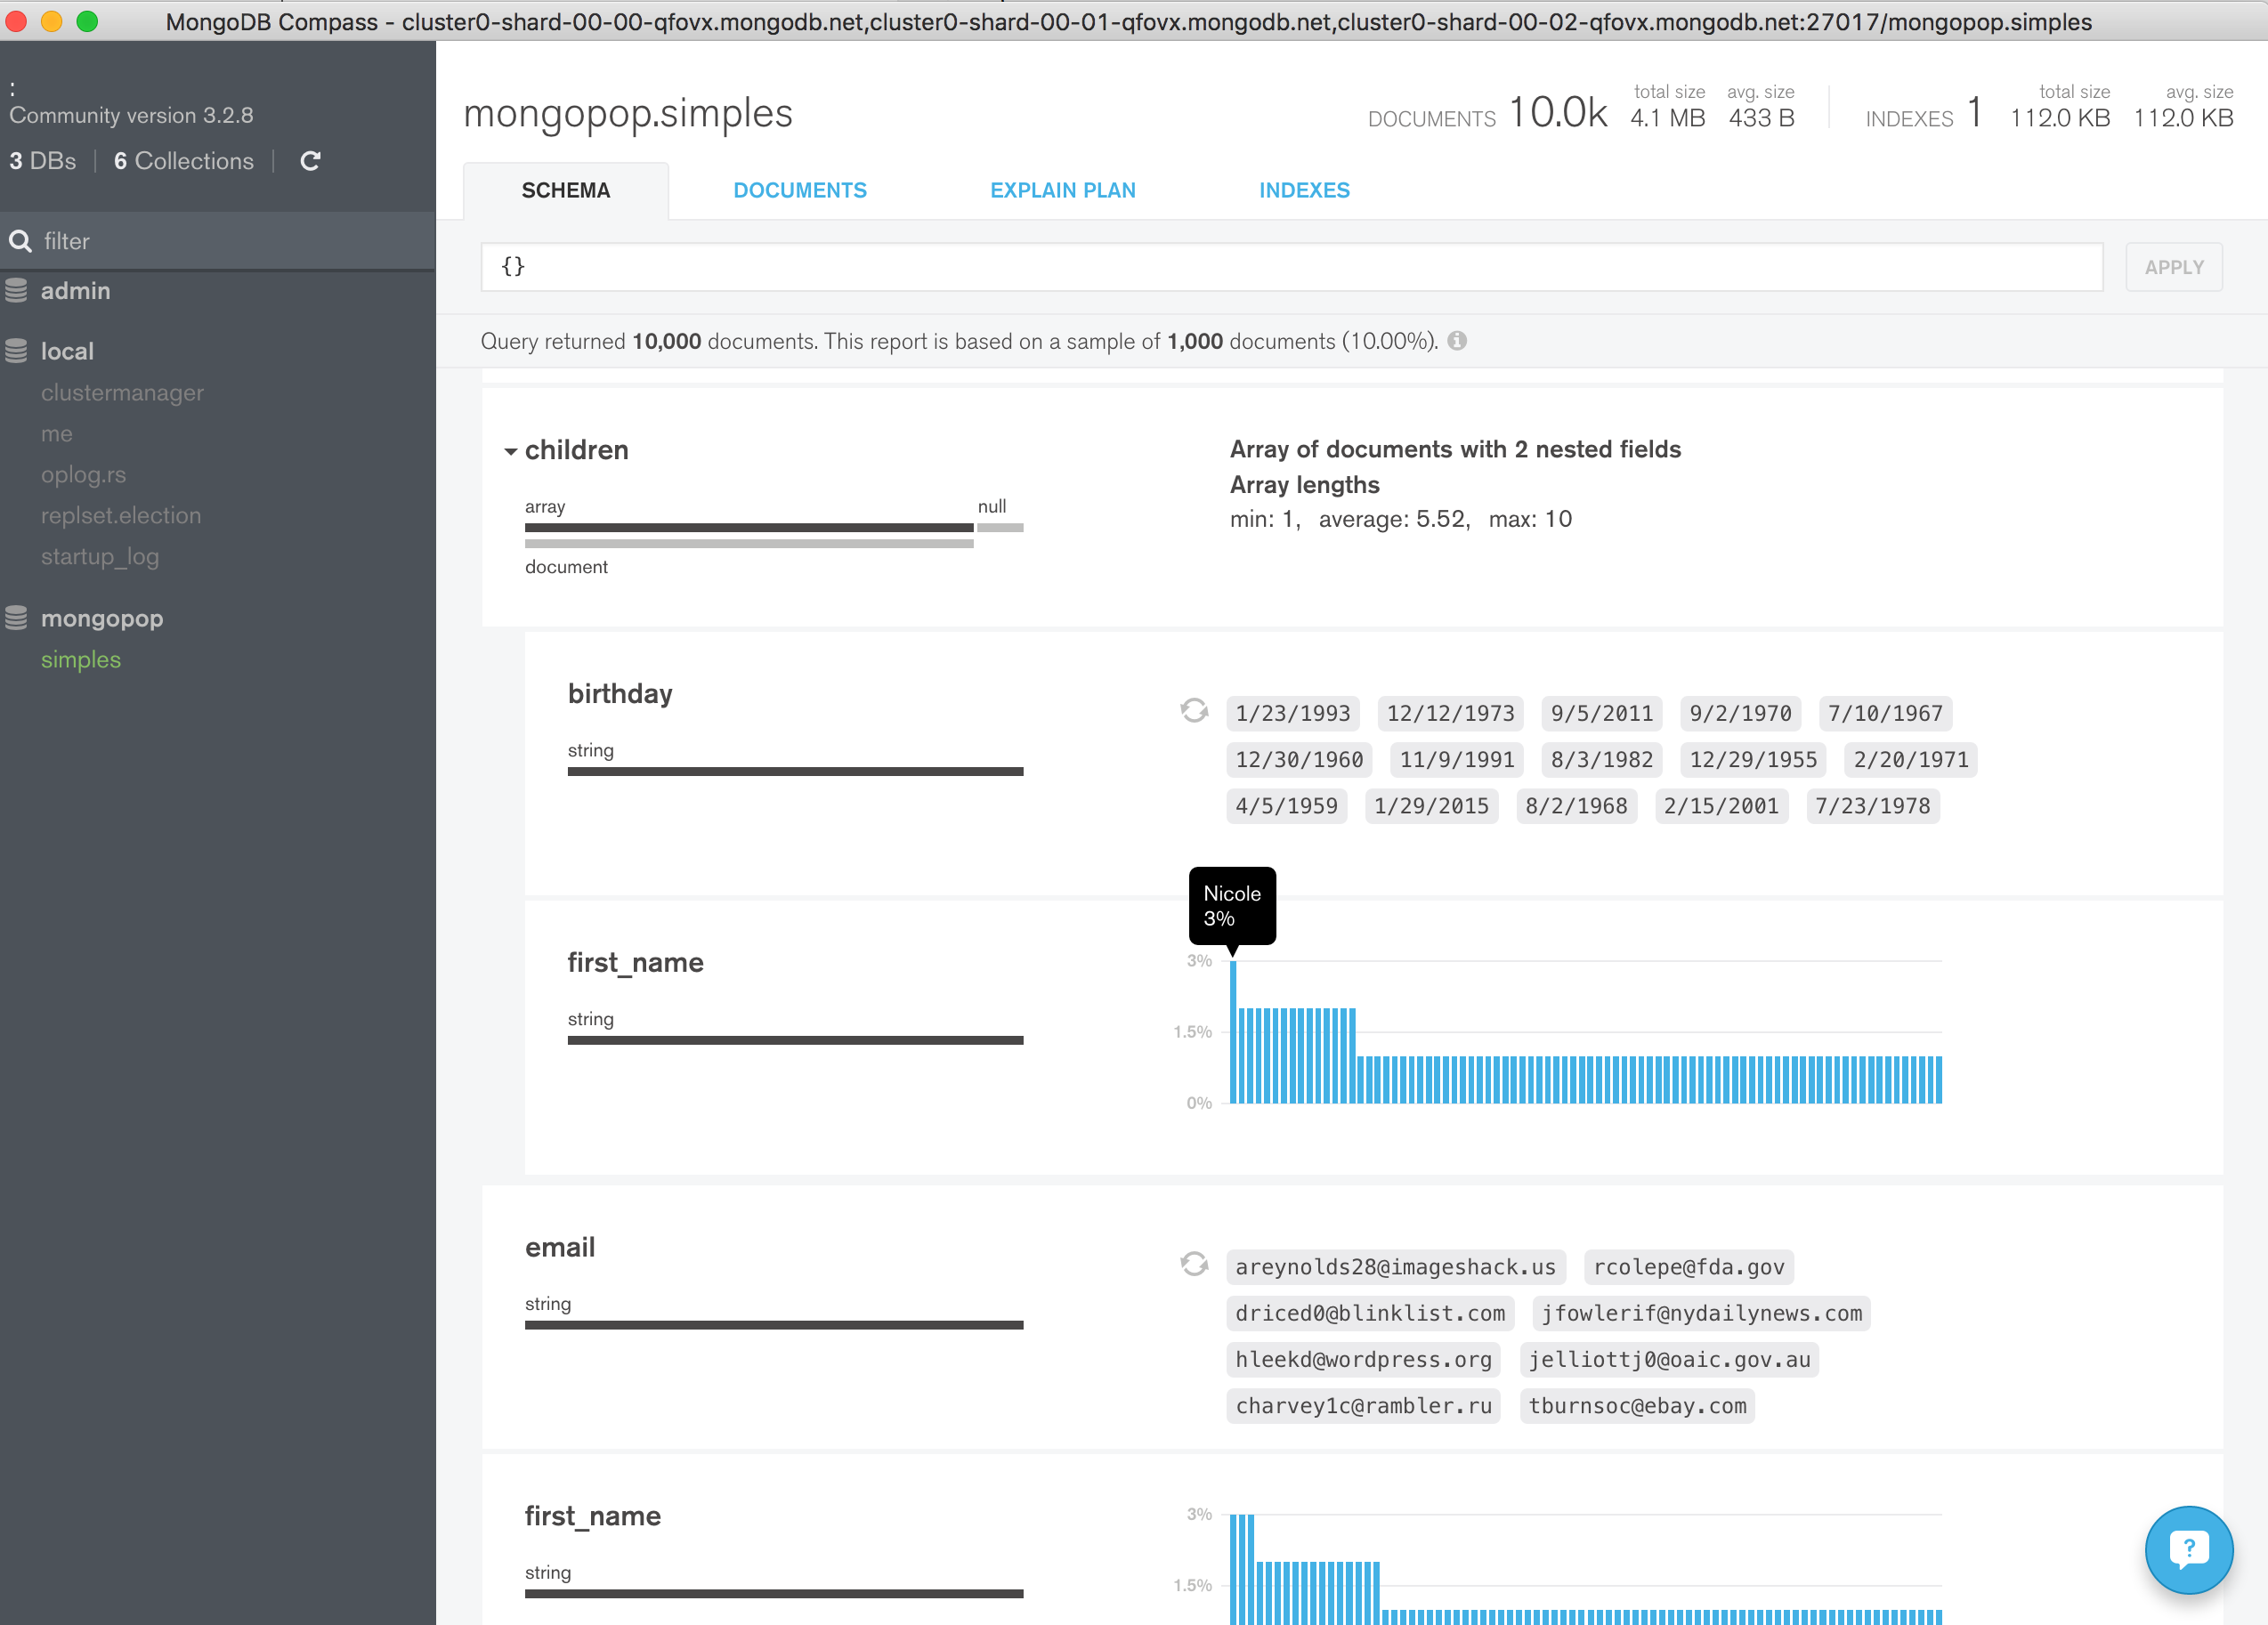
Figure 6: Explore MongoDB Atlas Data Using MongoDB Compass
It is also possible to add, delete, and modify documents (Figure 7).

Figure 7: Modify a Document in MongoDB Compass
You can verify that the document has really been updated from the MongoDB shell:
Cluster0-shard-0:PRIMARY> use appdatabase
Cluster0-shard-0:PRIMARY> db.simples.find({
    first_name: "Stephanie",
    last_name: "Green"}).pretty()
{
    "_id" : ObjectId("57a206be0e8ecb0d5b5549f9"),
    "first_name" : "Stephanie",
    "last_name" : "Green",
    "email" : "sgreen1b@tiny.cc",
    "gender" : "Female",
    "ip_address" : "129.173.45.61",
    "children" : [
        {
            "first_name" : "Eugene",
            "birthday" : "8/25/1985"
        },
        {
            "first_name" : "Nicole",
            "birthday" : "12/29/1963",
            "favoriteColor" : "Yellow"
        }
    ]
}
Migrating Your Data to MongoDB Atlas
This post has assumed that you’re building a new application but what if you already have one, with data stored in a MongoDB cluster that you’re managing yourself? Fortunately, the process to migrate your data to MongoDB Atlas (and back out again if desired) is straightforward and is described in Migrating Data to MongoDB Atlas.
We offer a MongoDB Atlas Migration service to help you properly configure MongoDB Atlas and develop a migration plan. This is especially helpful if you need to minimize downtime for your application, if you have a complex sharded deployment, or if you want to revise your deployment architecture as part of the migration. Contact us to learn more about the MongoDB Atlas Migration service.
Next Steps
While MongoDB Atlas radically simplifies the operation of MongoDB there are still some decisions to take to ensure the best performance and reliability for your application. The MongoDB Atlas Best Practices white paper provides guidance on best practices for deploying, managing, and optimizing the performance of your database with MongoDB Atlas.
The guide outlines considerations for achieving performance at scale with MongoDB Atlas across a number of key dimensions, including instance size selection, application patterns, schema design and indexing, and disk I/O. While this guide is broad in scope, it is not exhaustive. Following the recommendations in the guide will provide a solid foundation for ensuring optimal application performance.