KeystoneJS is an open source framework for building web applications and Content Management Systems. It’s built on top of MongoDB, Express, and Node.js – key components of the ubiquitous MEAN stack.
This post explains why MongoDB Atlas is an ideal choice for KeystoneJS and then goes on to show how to configure KeystoneJS to use it.
Why are KeystoneJS and MongoDB Atlas a Good Match
The MEAN stack is extremely popular and well supported and it’s the go to platform when developing modern applications. For its part, MongoDB brings flexible schemas, rich queries, an idiomatic Node.js driver, and simple to use high availability and scaling.
MongoDB Atlas provides all of the features of MongoDB, without the operational heavy lifting required for any new application. MongoDB Atlas is available on demand through a pay-as-you-go model and billed on an hourly basis, letting you focus on what you do best.
It’s easy to get started – use a simple GUI to select the instance size, region, and features you need. MongoDB Atlas provides:
- Security features to protect access to your data
- Built in replication for always-on availability, tolerating complete data center failure
- Backups and point in time recovery to protect against data corruption
- Fine-grained monitoring to let you know when to scale. Additional instances can be provisioned with the push of a button
- Automated patching and one-click upgrades for new major versions of the database, enabling you to take advantage of the latest and greatest MongoDB features
- A choice of cloud providers, regions, and billing options
Like KeystoneJS, MongoDB Atlas is a natural fit for users looking to simplify their development and operations work, letting them focus on what makes their application unique rather than commodity (albeit essential) plumbing.
Installing KeystoneJS and Configuring it to Use MongoDB Atlas
Before starting with KeystoneJS, you should launch your MongoDB cluster using MongoDB Atlas and then (optionally) create a user with read and write privileges for just the database that will be used for this project, as shown in Figure 1. You must also add the IP address of your application server to the IP Whitelist in the MongoDB Atlas security tab.

Figure 1: Creating KeystoneJS user in MongoDB Atlas
If it isn’t already installed on your system, download and install Node.js:
You should then add the bin sub-folder to your .bash_profile file and then install KeystoneJS:
Before starting KeystoneJS you need to configure it with details on how to connect to your specific MongoDB Atlas cluster. This is done by updating the MONGO_URI value within the .env file:
The URI contains these components:
keystonejs_useris the name of the user you created in the MongoDB Atlas UImy_passwordis the password you chose when creating the user in MongoDB Atlascluster0-shard-00-00-qfovx.mongodb.net,cluster0-shard-00-01-qfovx.mongodb.net, &cluster0-shard-00-02-qfovx.mongodb.netare the hostnames of the instances in your MongoDB Atlas replica set (click on the “CONNECT” button in the MongoDB Atlas UI if you don’t have these)27017is the standard MongoDB port numberclusterdbis the name of the database (schema) that KeystoneJS will use (note that this must match the project name used when installing KeystoneJS as well as the database you granted the user access to)- To enforce security, MongoDB Atlas mandates that the
ssloption is used adminis the database that’s being used to store the credentials forkeystonejs_user
Clients connect to KeystoneJS through port 3000 and so you must open that port in your firewall.
You can then start KeystoneJS:
$ node keystone
Testing the Configuration
Browse to the application at http://address-of-app-server:3000 as shown in Figure 2.

Figure 2: KeystoneJS Running on MongoDB Atlas
Sign in using the credentials shown and then confirm that you can upload some images to a gallery and create a new page as shown in Figure 3.

Figure 3: Create a Page in KeystoneJS with Data Stored in MongoDB Atlas
After saving the page, confirm that you can browse to the newly created post (Figure 4).
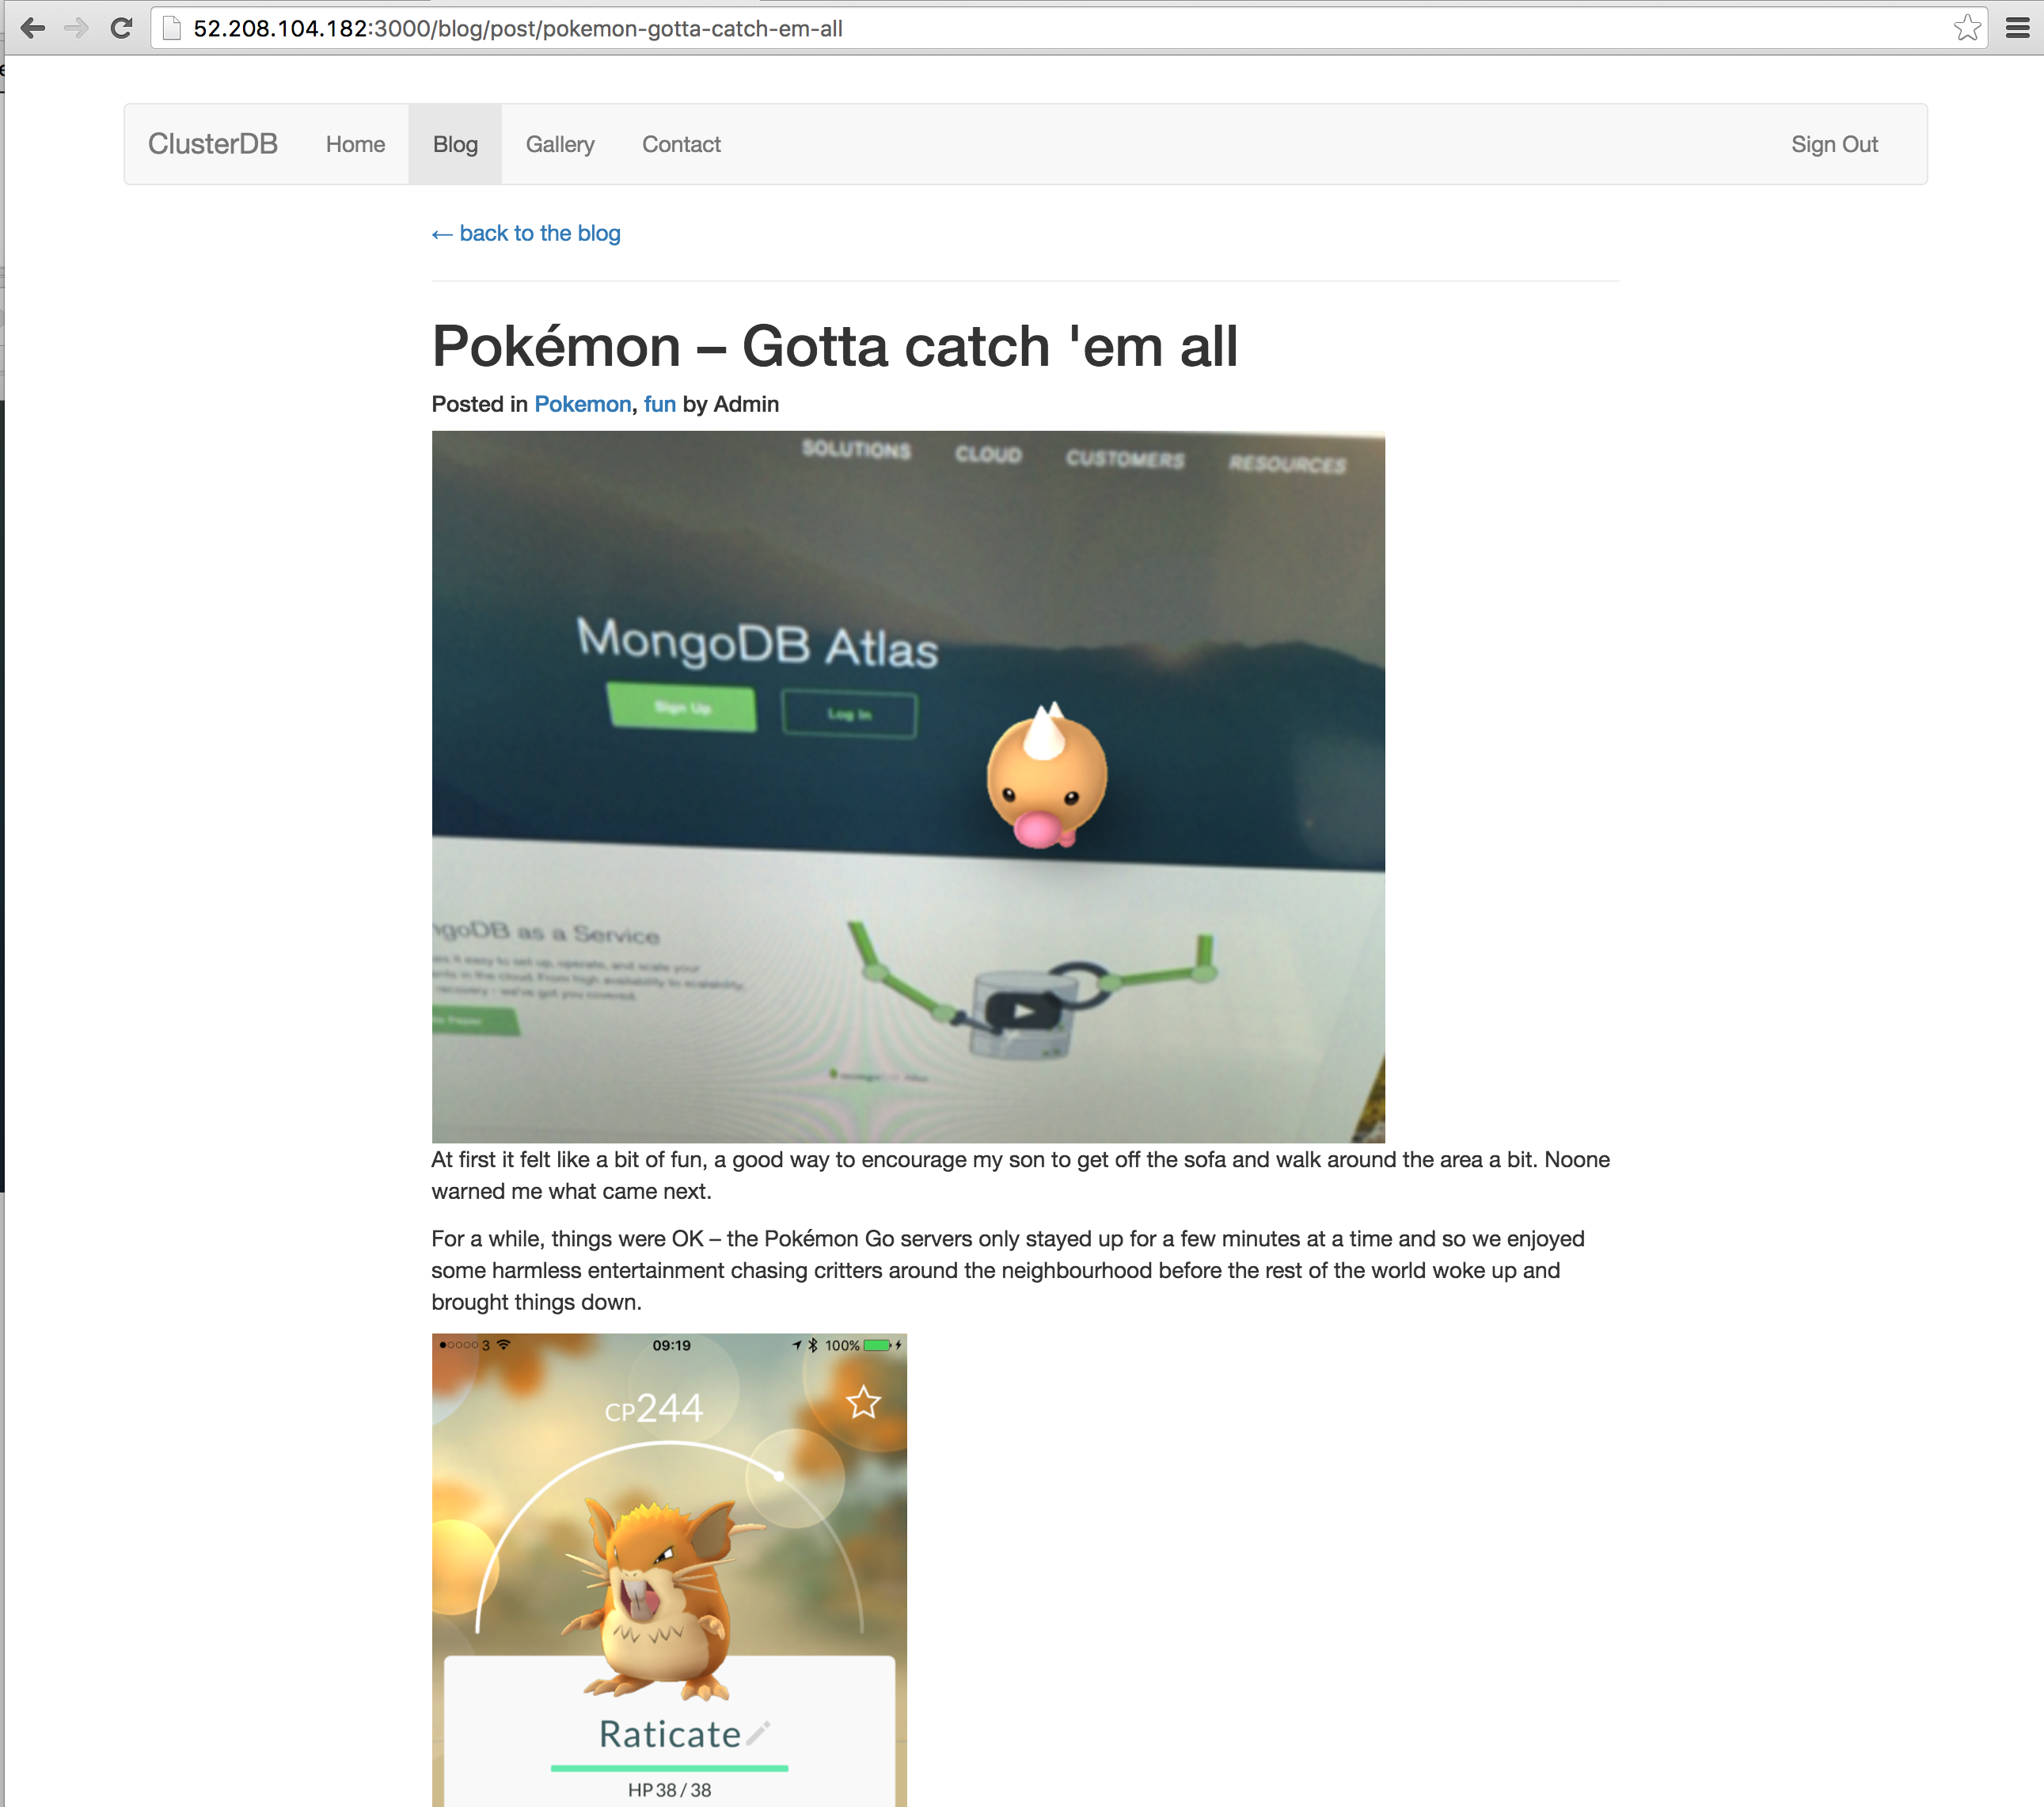
Figure 4: View KeystoneJS Post with Data Read from MongoDB Atlas
Optionally, confirm that, MongoDB Atlas really is being used by KeystoneJS, you can connect using the MongoDB shell:
To visually navigate through the schema and data created by KeystoneJS, download and install MongoDB Compass. The same credentials can be used to connect Compass to your MongoDB database – Figure 5.
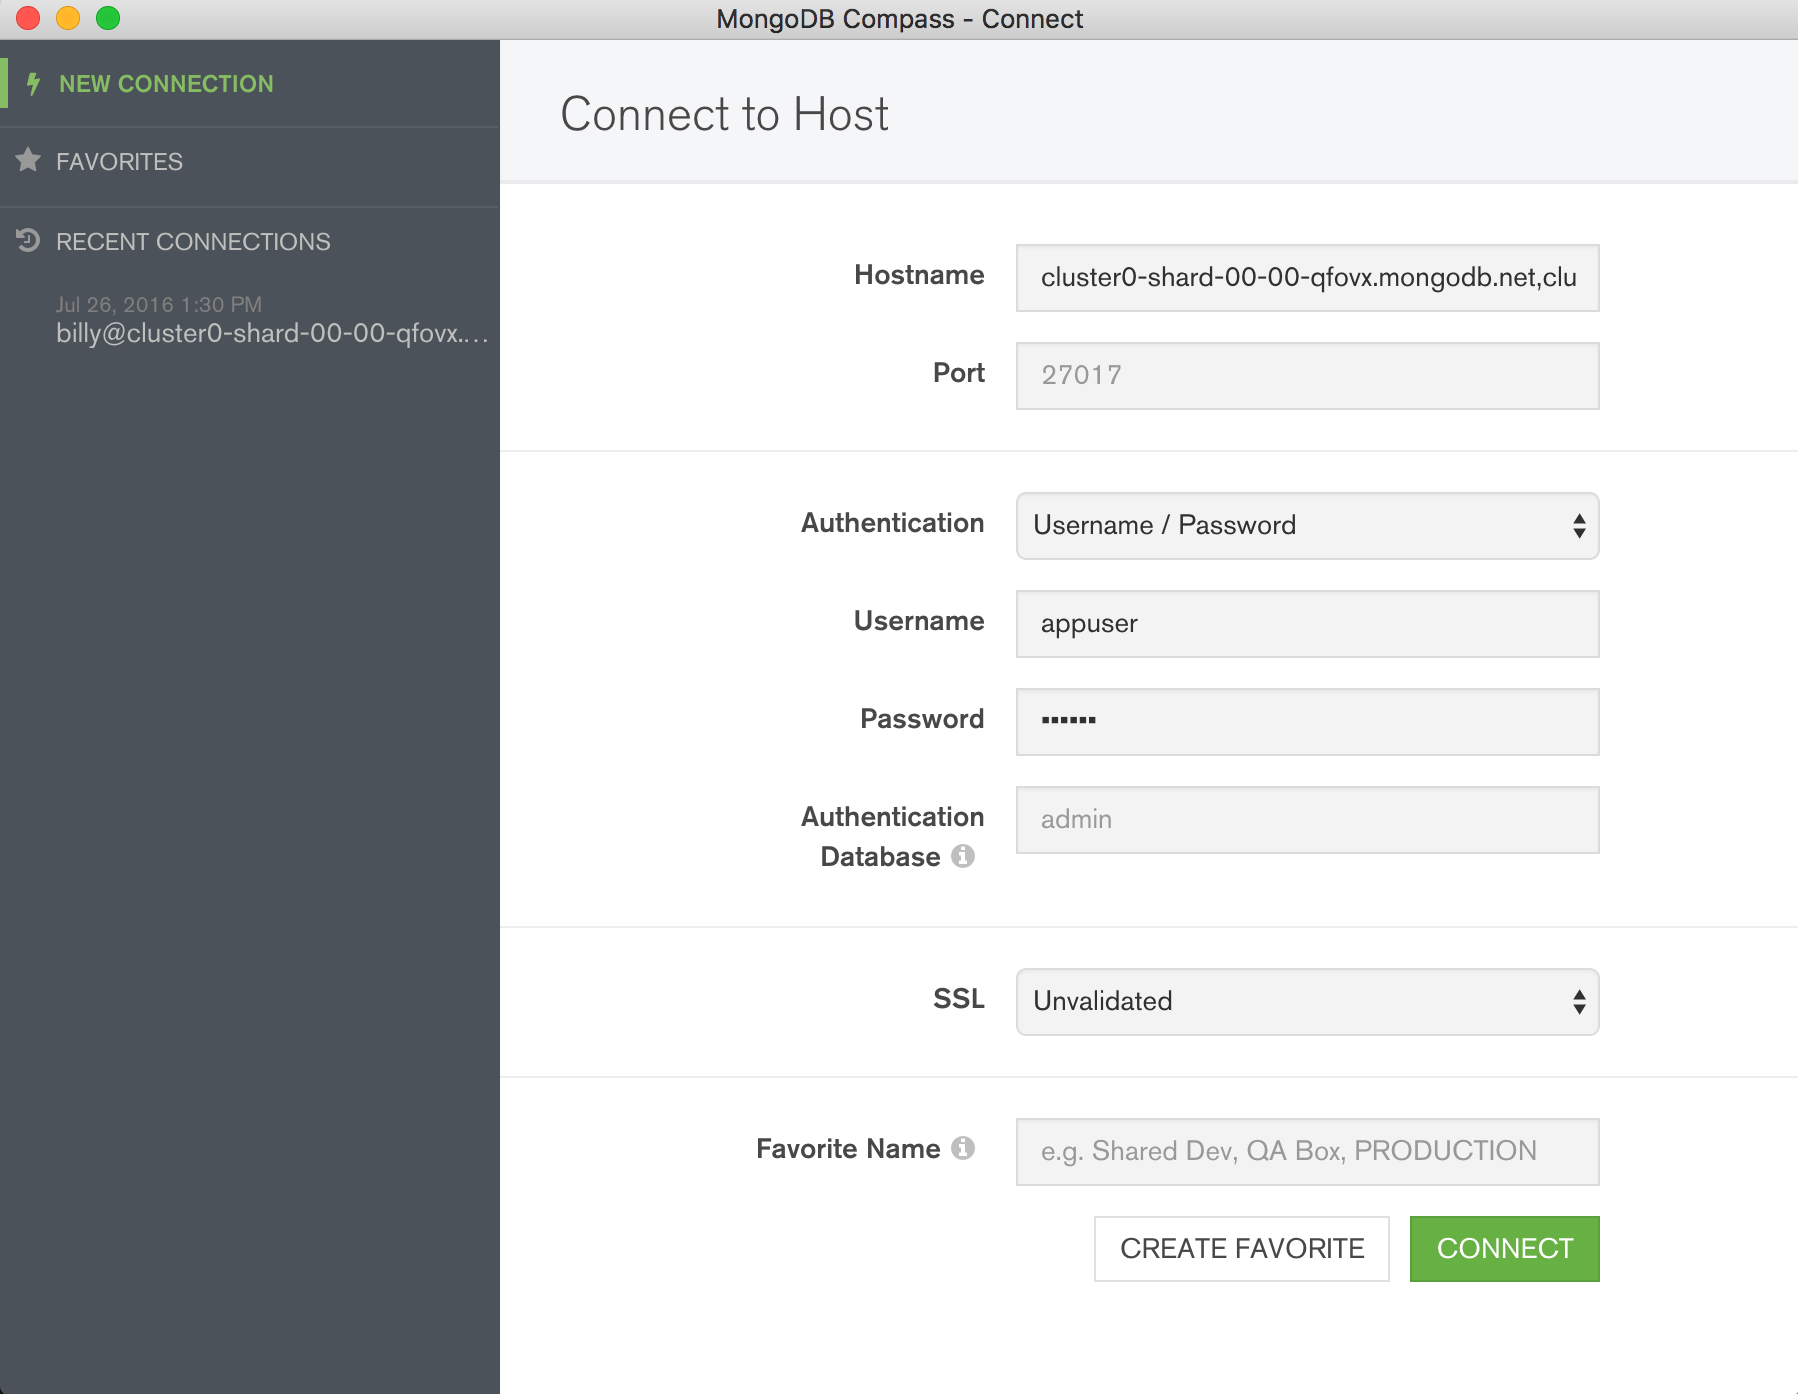
Figure 5: Connect MongoDB Compass to MongoDB Atlas Database
Navigate through the structure of the data in the clusterdb database (Figure 6) and view the JSON documents (Figure 7).
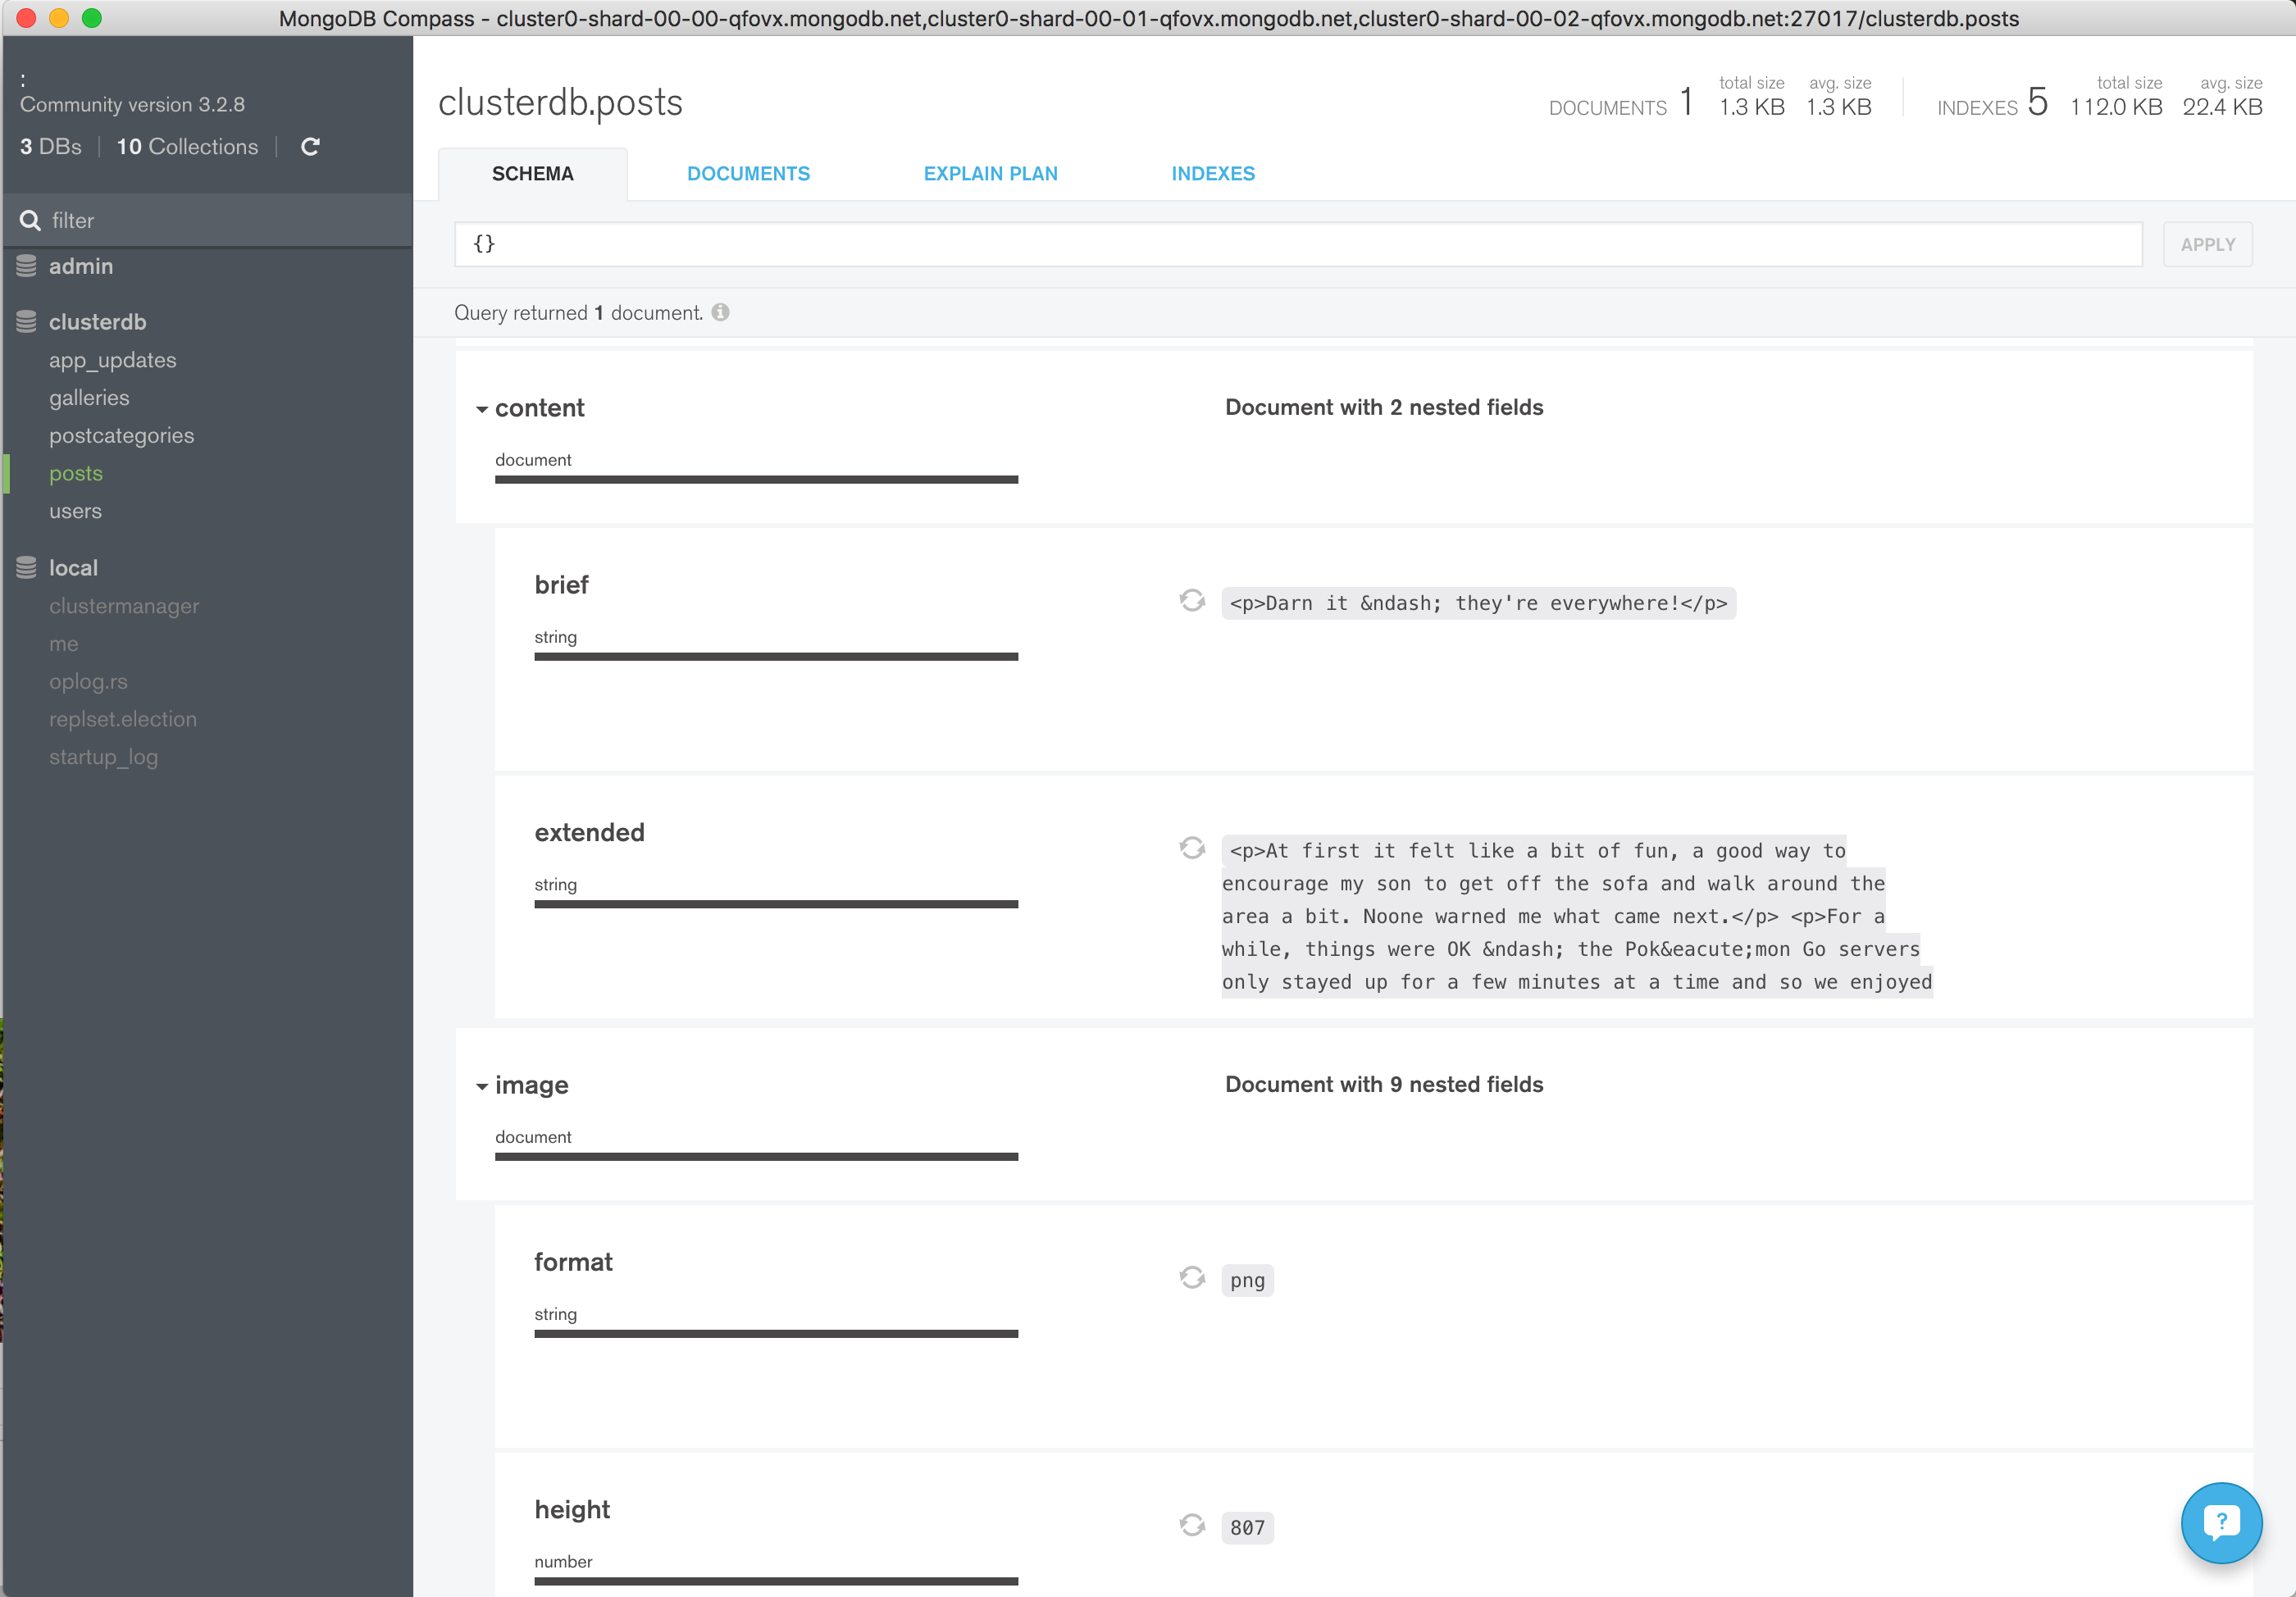
Figure 6: Explore KeystoneJS Schema Using MongoDB Compass
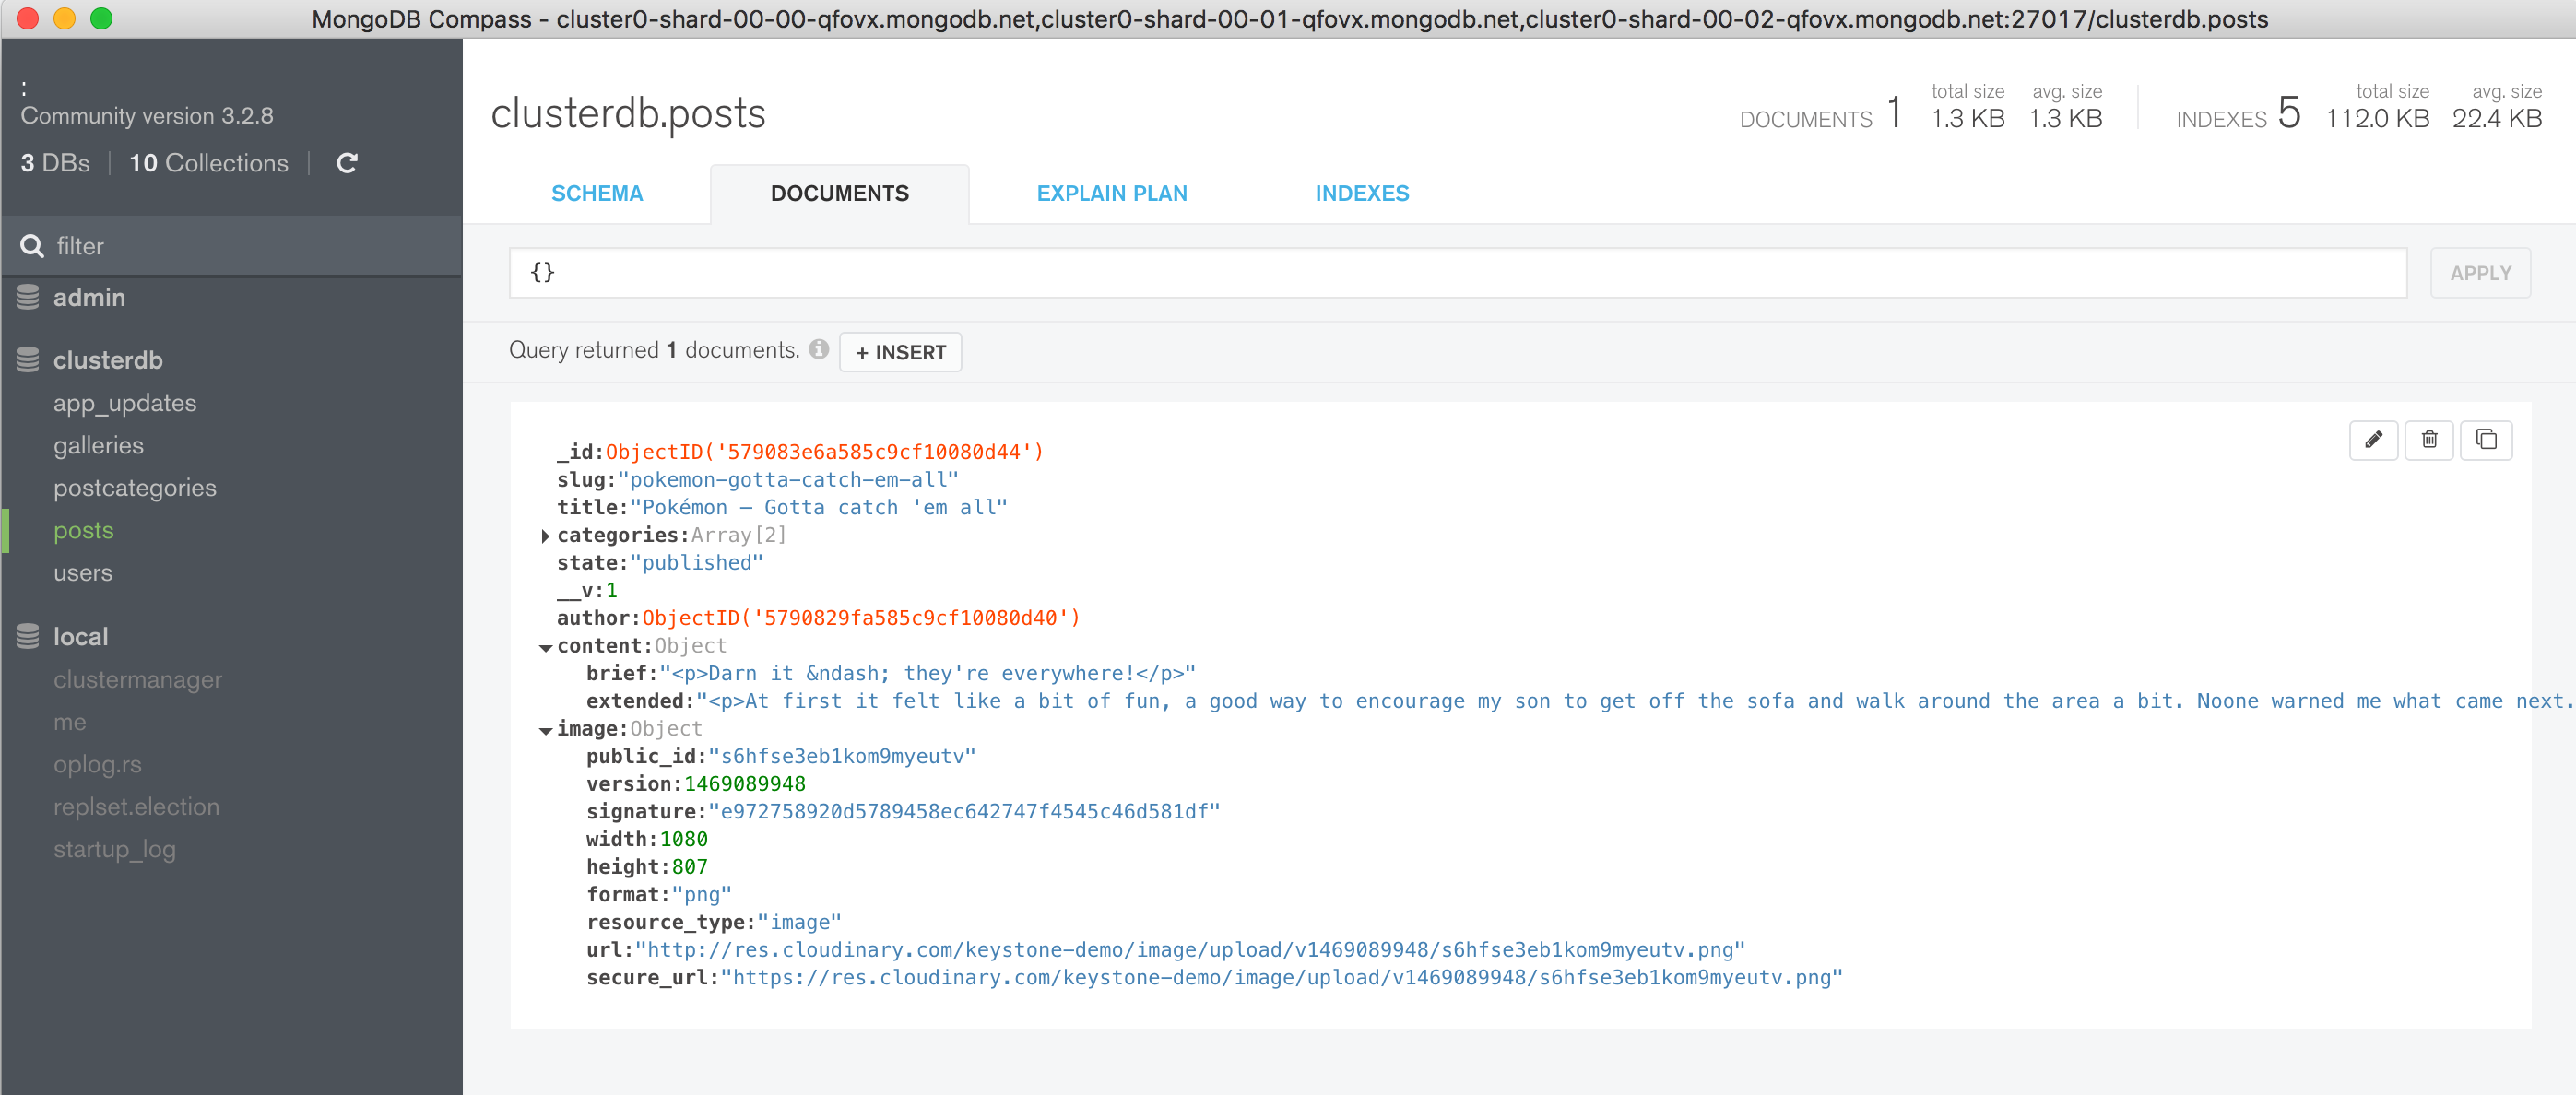
Figure 7: View Documents Stored by KeystoneJS Using MongoDB Atlas
Next Steps
While MongoDB Atlas radically simplifies the operation of MongoDB there are still some decisions to take to ensure the best performance and reliability for your application. The MongoDB Atlas Best Practices white paper provides guidance on best practices for deploying, managing, and optimizing the performance of your database with MongoDB Atlas.
The guide outlines considerations for achieving performance at scale with MongoDB Atlas across a number of key dimensions, including instance size selection, application patterns, schema design and indexing, and disk I/O. While this guide is broad in scope, it is not exhaustive. Following the recommendations in the guide will provide a solid foundation for ensuring optimal application performance.