Most apps and websites contain much functionality that’s tedious to implement and has been done thousands of times before. MongoDB Stitch takes care of a lot of these chores – for example, making it simple to interact with third-party APIs. This post explains how I used Stitch to do just that that this week.
I recently described how I ported my legacy website to Stitch. After reading that post, one of our Paris Solution Architects spotted that there was a bug in how I was validating phone numbers in my forms (specific to France’s dialling plan). I was about to go into my code to tweak the regular expressions to cope with French phone numbers. However, what if there was another country with odd rules? What if the rules changed?
It then struck me that this is precisely the kind of chore that I should use Stitch to replace – being an expert in regular expressions and country-specific dialling plans wasn’t going to make the experience any better for my users, and so I should contract it out to “someone” else.
A quick Google later, and I’d settled on the NumVerify service which provides an API to validate phone numbers and add some extra information such as the type of line and the same number in full international format.
To access the NumVerify API, I needed to create a Stitch HTTP service. I named the service apiplayer.net and created a rule to allow the service to access the required domain (apiplayer.net) using GET requests:
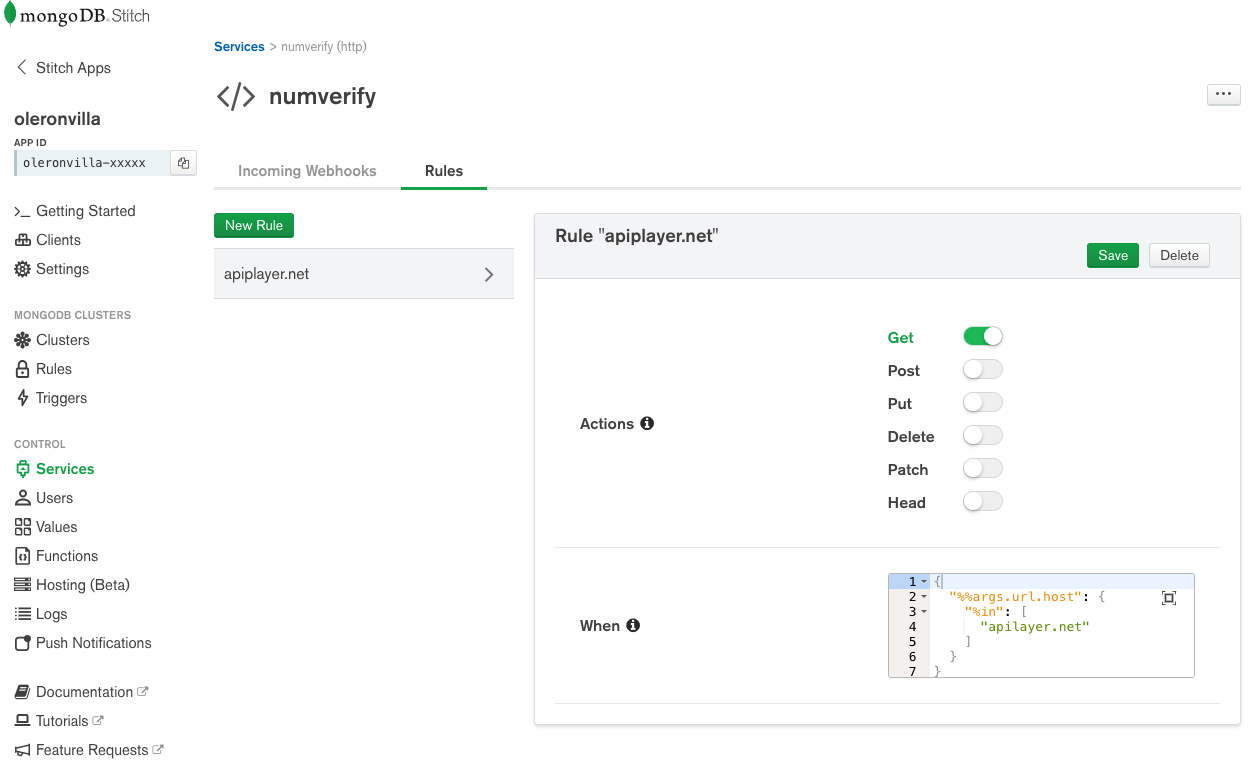
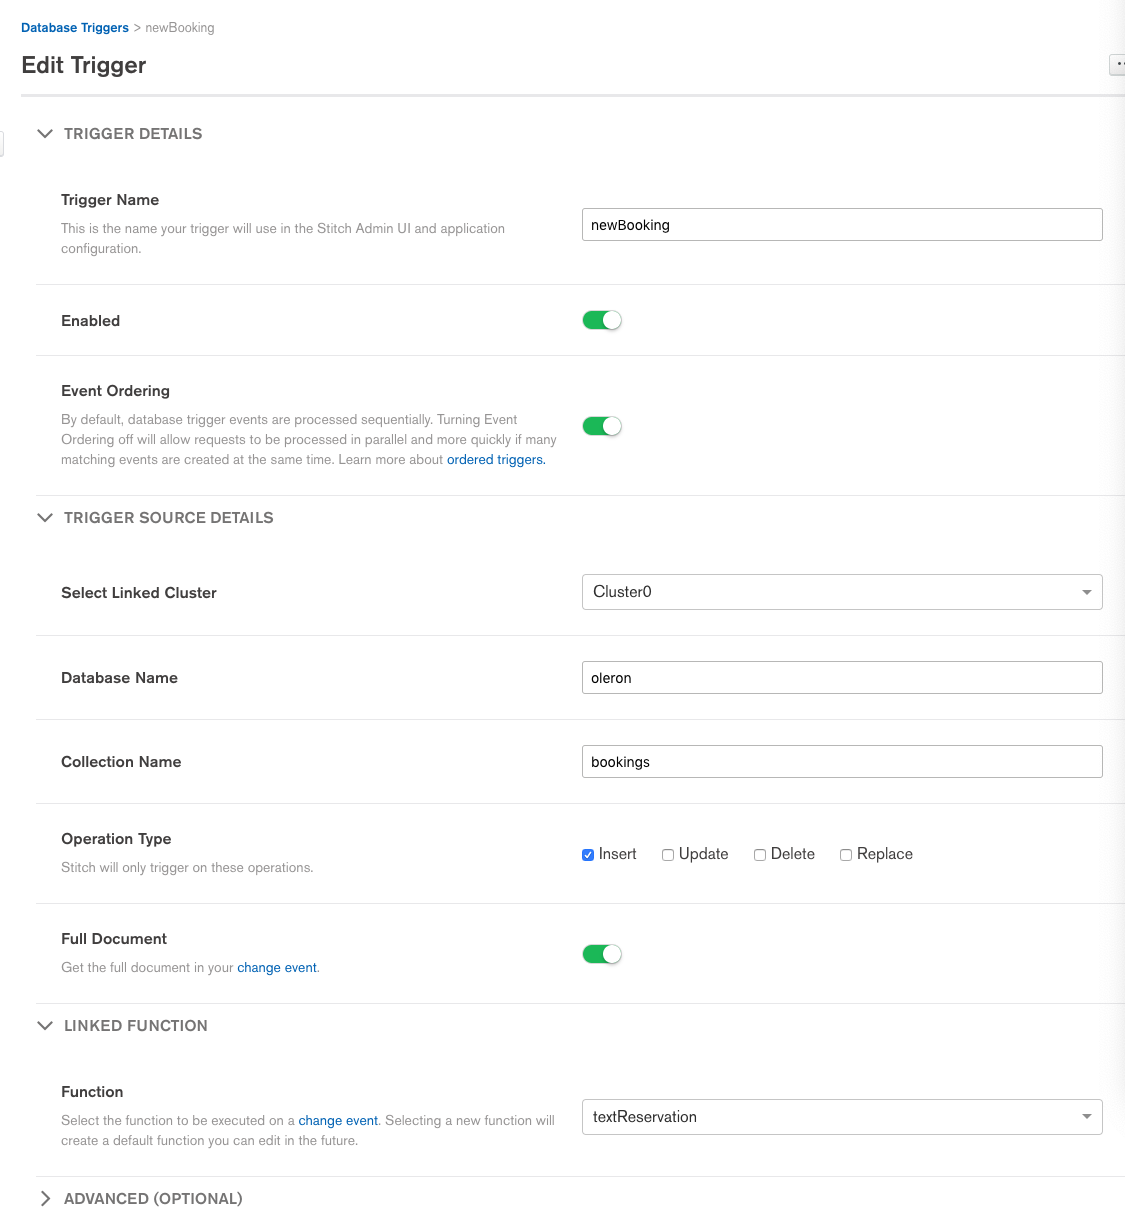
Then I can call use that service from a new Stitch Function (verifyPhoneNumber):
exports = function(phoneNumber){
  const APIKey = context.values.get("numverifyAPIKey");
  const http = context.services.get("numverify");
  const url = "http://apilayer.net/api/validate?access_key=" + APIKey + "&number=" + phoneNumber + "&country_code=&format=1";
  var validationResults;

  return http.get({"url": url})
  .then((resp) => {
      const result = EJSON.parse(resp.body.text());
      if (result.valid) {
        console.log(result.international_format);
        return result;
      } else {
        console.log(result.number + " is not a valid phone number");
        return {valid: false};
      }
    },
    (error) => {
      console.log("Verification failed: " + error);
      return {valid: false};
    }
  );
};
Note that numverifyAPIKey is a Stitch Value that I’ve set to the API key I received when registering with NumVerify.
A typical (successful) result from this function looks like:
{
  "valid": true,
  "number": "448449808001",
  "local_format": "08449808001",
  "international_format": "+448449808001",
  "country_prefix": "+44",
  "country_code": "GB",
  "country_name": "United Kingdom of Great Britain and North",
  "location": "",
  "carrier": "",
  "line_type": "special_services"
}
The JavaScript running in the browser now executes the Stitch Function:
function validatePhone (inputField, helpText) {
  return new Promise(function(resolve, reject) {
    if (!validateNonEmpty (inputField, helpText)) {resolve(false)} else {
      const client = stitch.Stitch.defaultAppClient;
      client.callFunction("verifyPhoneNumber", [inputField.value]).then(
      result => {
        if (result.valid) {
          inputField.value = result.international_format;
          resolve(true);
        } else {
          helpText.innerHTML =
            '<span class="english_material" lang="en">Phone number is invalid."</span>\
             <span class="french_material" lang="fr">Le numéro de téléphone est invalide.</span>';
             resolve(false);
        }
      }),(
      error => {
        helpText.innerHTML =
          '<span class="english_material" lang="en">Phone number validation failed, but you can submit anyway."</span>\
           <span class="french_material" lang="fr">La validation du numéro de téléphone a échoué, mais vous pouvez quand même soumettre.</span>';
        // Not going to reject the form request just because the cloud service
        // is unavailable
        resolve(true);
      });
    }
  })
}
NumVerify is as flexible as possible in accepting phone numbers in different formats. It also sets the resulting international_format field to a fully formatted international number – I use that to replace the user-provided number in the form, ensuring that all numbers stored in Atlas are in the same format. In one swoop, I’ve ripped out my spaghetti regular expression code, made the validations more robust, and added a new feature (normalizing the phone numbers before I store them) – result!
See the results at stitch.oleronvilla.com, but please don’t judge my code, I still need to delegate a lot more to Stitch and other services!
Creating your first Stitch app? Start with one of the Stitch tutorials.
Want to learn more about MongoDB Stitch? Read the white paper.