 MySQL Cluster Manager 1.3.1 is now available to download from My Oracle Support and soon from the Oracle Software Delivery Cloud.
Details are available in the the MCM 1.3.1 Release Notes .
MySQL Cluster Manager 1.3.1 is now available to download from My Oracle Support and soon from the Oracle Software Delivery Cloud.
Details are available in the the MCM 1.3.1 Release Notes .
Thomas Nielsen and I recently presented a webinar explaining the latest developments in managing MySQL Cluster. In case you weren’t able to attend (or wanted to refresh your memory) then the webinar replay and charts are now available.
As a reminder, this webinar covered what’s new in MySQL Cluster Manager 1.3 which recently went GA.
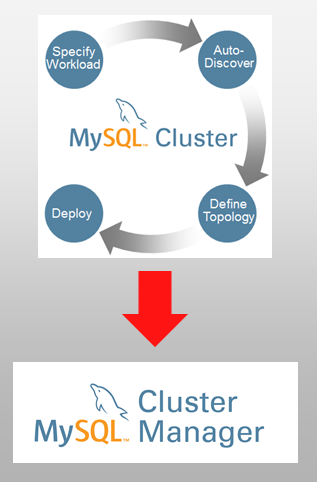
By their very nature, clustered environments involve more efforts and resources to administer than standalone systems and this holds true for MySQL Cluster, the database designed for web-scale throughput with carrier-grade availability.
The MySQL Cluster Auto-Installer guides you through defining and running a well configured MySQL Cluster database – combining auto-discovery of platform resources with built-in best practices in an intuitive web-based GUI.
MySQL Cluster Manager (available as part of the commercial MySQL Cluster Carrier Grade Edition) simplifies the ongoing management of MySQL Cluster by automating common management tasks, delivering higher administration productivity and enhancing cluster agility. Tasks that used to take 46 commands can be reduced to just one! These tasks include configuration, starting & stopping the cluster, upgrades and backup/restore and new for MCM 1.3, import a running Cluster.
These webinars are always a good opportunity to get your questions answered; here’s a catch up of the Q&A from this session:
On Thursday 23rd January, Thomas Nielsen and I will be hosting a webinar explaining the latest developments in managing MySQL Cluster. As always the webinar is free but please register here.
Note that we’ll be covering what’s new in MySQL Cluster Manager 1.3 which went GA this week.
By their very nature, clustered environments involve more efforts and resources to administer than standalone systems and this holds true for MySQL Cluster, the database designed for web-scale throughput with carrier-grade availability.
The MySQL Cluster Auto-Installer guides you through defining and running a well configured MySQL Cluster database – combining auto-discovery of platform resources with built-in best practices in an intuitive web-based GUI.
MySQL Cluster Manager (available as part of the commercial MySQL Cluster Carrier Grade Edition) simplifies the ongoing management of MySQL Cluster by automating common management tasks, delivering higher administration productivity and enhancing cluster agility. Tasks that used to take 46 commands can be reduced to just one! These tasks include configuration, starting & stopping the cluster, upgrades and backup/restore and new for MCM 1.3, import a running Cluster.
Join this webcast to get up to speed on the latest developments in these tools and learn how to exploit them to make management of MySQL Cluster simple, efficient and reliable.
Times:
Even if you can’t join the live webinar, it’s worth registering as you’ll be emailed a link to the replay as soon as it’s available.

MySQL Cluster Manager 1.3.0 is now Generally Available and can be downloaded from the Oracle Software Delivery Cloud. The release contains a number of enhancements including performance improvements, handling larger clusters and of course bug fixes. The other big feature is that you can now import an existing, running MySQL Cluster instance into MCM without having to stop it first – this is the topic for this post.
In the past, we had a nice browser-based tool (the MySQL Clster Auto-Installer) to get a well configured cluster up and running (tuned to your environment) and we also had MySQL Cluster Manager to simplify the ongoing management of the cluster. Unfortunately, if you wanted to migrate the cluster you’d created with the auto-installer (or built by hand) then you first had to shut it down and then follow a manual procedure. MCM 1.3 introduces an import command that takes a running cluster and brings it under the control of MCM without having to stop the cluster (or suspend reads or writes). There are still some manual steps involved and the first half of this post will step through this process:
Once the import has been completed, the post will then step though a number of MCM tasks to test that everything has gone to plan and also to give a reminder of how simple operations such as upgrades, backup/restore and adding new nodes is once you’re using MCM.
For this example, a cluster is used that’s been created using the auto-installer that was a part of MySQL Cluster 7.3.2 (the version is signifficant as from MySQL Cluster 7.3.3, the auto-installer creates .conf) files for the mysqld processes rather than specifying everything on the command-line – that simplifies the import process).
Before going any further, some data is added to the database so that I can later check that it’s not been lost:
mysql@connect13a ~]$ mysql -h 127.0.0.1 -P3306 -u root
Welcome to the MySQL monitor.  Commands end with ; or \g.
Your MySQL connection id is 2
Server version: 5.5.34-ndb-7.2.14-cluster-gpl MySQL Cluster Community Server (GPL)

Copyright (c) 2000, 2013, Oracle and/or its affiliates. All rights reserved.

Oracle is a registered trademark of Oracle Corporation and/or its
affiliates. Other names may be trademarks of their respective
owners.

Type 'help;' or '\h' for help. Type '\c' to clear the current input statement.

mysql> CREATE DATABASE clusterdb;USE clusterdb;
Query OK, 1 row affected (0.06 sec)

mysql> CREATE TABLE simples (id INT AUTO_INCREMENT PRIMARY KEY, time TIMESTAMP) ENGINE=ndb;
Query OK, 0 rows affected (0.15 sec)

mysql> REPLACE INTO simples VALUES ();
Query OK, 1 row affected (0.00 sec)

mysql> REPLACE INTO simples VALUES ();
Query OK, 1 row affected (0.01 sec)

mysql> REPLACE INTO simples VALUES ();
Query OK, 1 row affected (0.00 sec)

mysql> REPLACE INTO simples VALUES ();
Query OK, 1 row affected (0.00 sec)

mysql> SELECT * FROM simples;
+----+---------------------+
| id | time                |
+----+---------------------+
|  3 | 2014-01-07 11:13:30 |
|  1 | 2014-01-07 11:13:28 |
|  2 | 2014-01-07 11:13:29 |
|  4 | 2014-01-07 11:13:30 |
+----+---------------------+
4 rows in set (0.00 sec)
The topology of the resulting cluster can be checked using the show command:
mysql@connect13b ~]$ cluster_7_2_14/bin/ndb_mgm -e show
Connected to Management Server at: localhost:1186
Cluster Configuration
---------------------
[ndbd(NDB)]     2 node(s)
id=1    @192.168.56.103  (mysql-5.5.34 ndb-7.2.14, Nodegroup: 0, Master)
id=2    @192.168.56.104  (mysql-5.5.34 ndb-7.2.14, Nodegroup: 0)

[ndb_mgmd(MGM)] 2 node(s)
id=49   @192.168.56.101  (mysql-5.5.34 ndb-7.2.14)
id=52   @192.168.56.102  (mysql-5.5.34 ndb-7.2.14)

[mysqld(API)]   8 node(s)
id=50 (not connected, accepting connect from 192.168.56.101)
id=51 (not connected, accepting connect from 192.168.56.101)
id=53 (not connected, accepting connect from 192.168.56.102)
id=54 (not connected, accepting connect from 192.168.56.102)
id=55   @192.168.56.101  (mysql-5.5.34 ndb-7.2.14)
id=56   @192.168.56.101  (mysql-5.5.34 ndb-7.2.14)
id=57   @192.168.56.102  (mysql-5.5.34 ndb-7.2.14)
id=58   @192.168.56.102  (mysql-5.5.34 ndb-7.2.14)
To define (but not create) the cluster in MCM, the following entities need to be defined:
The MCM daemon mcmd must first be started on each of the target hosts and the mcm client run on any host before creating each of these entities:
[mysql@connect13a ~]$ ./mcm1.3/mcm1.3.0/bin/mcmd&
MySQL Cluster Manager 1.3.0 (64bit) started
Connect to MySQL Cluster Manager by running "/home/mysql/mcm1.3/mcm1.3.0/bin/mcm" -a connect13a.localdomain:1862

[mysql@connect13b ~]$ ./mcm1.3/mcm1.3.0/bin/mcmd&
[1] 3068

[mysql@connect13b ~]$ MySQL Cluster Manager 1.3.0 (64bit) started
Connect to MySQL Cluster Manager by running "/home/mysql/mcm1.3/mcm1.3.0/bin/mcm" -a connect13b.localdomain:1862

[mysql@connect13c ~]$  ./mcm1.3/mcm1.3.0/bin/mcmd&
[1] 1922
[mysql@connect13c ~]$ MySQL Cluster Manager 1.3.0 (64bit) started
Connect to MySQL Cluster Manager by running "/home/mysql/mcm1.3/mcm1.3.0/bin/mcm" -a connect13c.localdomain:1862

[mysql@connect13d ~]$  ./mcm1.3/mcm1.3.0/bin/mcmd&
[1] 1936
[mysql@connect13d ~]$ MySQL Cluster Manager 1.3.0 (64bit) started
Connect to MySQL Cluster Manager by running "/home/mysql/mcm1.3/mcm1.3.0/bin/mcm" -a connect13d.localdomain:1862

[mysql@connect13a ~]$ ./mcm1.3/mcm1.3.0/bin/mcm
MySQL Cluster Manager client started.
This wrapper will spawn the mysql client to connect to mcmd

Welcome to the MySQL monitor.  Commands end with ; or \g.
Your MySQL connection id is 1
Server version: 1.3.0 MySQL Cluster Manager

Copyright (c) 2000, 2013, Oracle and/or its affiliates. All rights reserved.

Oracle is a registered trademark of Oracle Corporation and/or its
affiliates. Other names may be trademarks of their respective
owners.

Type 'help;' or '\h' for help. Type '\c' to clear the current input statement.

mcm> CREATE SITE --hosts=192.168.56.101,192.168.56.102,192.168.56.103,192.168.56.104 mysite;
+---------------------------+
| Command result            |
+---------------------------+
| Site created successfully |
+---------------------------+
1 row in set (1.34 sec)

mcm> add package --basedir=/home/mysql/cluster_7_2_14 7_2_14;
+----------------------------+
| Command result             |
+----------------------------+
| Package added successfully |
+----------------------------+
1 row in set (0.40 sec)

mcm> CREATE CLUSTER --import --package=7_2_14 --processhosts=ndb_mgmd:49@192.168.56.101,
ndb_mgmd:52@192.168.56.102,ndbmtd:1@192.168.56.103,ndbmtd:2@192.168.56.104,mysqld:55@192.168.56.101,
mysqld:56@192.168.56.101,mysqld:57@192.168.56.102,mysqld:58@192.168.56.102,ndbapi:50@192.168.56.101,
ndbapi:51@192.168.56.101,ndbapi:53@192.168.56.102,ndbapi:54@192.168.56.102 mycluster;
+------------------------------+
| Command result               |
+------------------------------+
| Cluster created successfully |
+------------------------------+
1 row in set (0.34 sec)

mcm> SHOW STATUS -r mycluster;
+--------+----------+-----------------+--------+-----------+---------+
| NodeId | Process  | Host            | Status | Nodegroup | Package |
+--------+----------+-----------------+--------+-----------+---------+
| 49     | ndb_mgmd | 192.168.56.101  | import |           | 7_2_14  |
| 52     | ndb_mgmd | 192.168.56.102  | import |           | 7_2_14  |
| 1      | ndbmtd   | 192.168.56.103  | import | n/a       | 7_2_14  |
| 2      | ndbmtd   | 192.168.56.104  | import | n/a       | 7_2_14  |
| 55     | mysqld   | 192.168.56.101  | import |           | 7_2_14  |
| 56     | mysqld   | 192.168.56.101  | import |           | 7_2_14  |
| 57     | mysqld   | 192.168.56.102  | import |           | 7_2_14  |
| 58     | mysqld   | 192.168.56.102  | import |           | 7_2_14  |
| 50     | ndbapi   | *192.168.56.101 | import |           |         |
| 51     | ndbapi   | *192.168.56.101 | import |           |         |
| 53     | ndbapi   | *192.168.56.102 | import |           |         |
| 54     | ndbapi   | *192.168.56.102 | import |           |         |
+--------+----------+-----------------+--------+-----------+---------+
12 rows in set (0.06 sec)
This post doesn’t attempt to go into details about all of the commands shown above but if you’re new to MCM then check out the MySQL Cluster documentation. The --import option sets the state of each of the nodes to import; they will stay in that state until the import command is run later.
When the auto-installer created the cluster, it changed a number of the configuration parameters from their defaults (either with command-line options or using configuration files). Using the LINUX ps -ef command you can identify all of these settings (either directly or by examining the configuration files that are referenced):
[mysql@connect13a ~]$ ps -ef | grep ndb_mgmd
mysql     2766     1  2 Jan07 ?        00:34:27 /home/mysql/cluster_7_2_14/bin/ndb_mgmd --initial
--ndb-nodeid=49 --config-dir=/home/mysql/MySQL_Cluster/49/
--config-file=/home/mysql/MySQL_Cluster/49/config.ini

[mysql@connect13b ~]$ ps -ef | grep ndb_mgmd
mysql     2426     1  2 Jan07 ?        00:32:26 /home/mysql/cluster_7_2_14/bin/ndb_mgmd --initial
--ndb-nodeid=52 --config-dir=/home/mysql/MySQL_Cluster/52/
--config-file=/home/mysql/MySQL_Cluster/52/config.ini

[mysql@connect13a ~]$ ps -ef | grep mysqld
mysql     3289     1  1 Jan07 ?        00:15:07 /home/mysql/cluster_7_2_14/bin/mysqld --no-defaults
--datadir=/home/mysql/MySQL_Cluster/55/ --tmpdir=/home/mysql/MySQL_Cluster/55/tmp
--basedir=/home/mysql/cluster_7_2_14/ --port=3306 --ndbcluster --ndb-nodeid=55
--ndb-connectstring=192.168.56.101:1186,192.168.56.102:1186,
--socket=/home/mysql/MySQL_Cluster/55/mysql.socket
mysql     3392     1  1 Jan07 ?        00:15:08 /home/mysql/cluster_7_2_14/bin/mysqld --no-defaults
--datadir=/home/mysql/MySQL_Cluster/56/ --tmpdir=/home/mysql/MySQL_Cluster/56/tmp
--basedir=/home/mysql/cluster_7_2_14/ --port=3307 --ndbcluster --ndb-nodeid=56
--ndb-connectstring=192.168.56.101:1186,192.168.56.102:1186,
--socket=/home/mysql/MySQL_Cluster/56/mysql.socket

[mysql@connect13b ~]$ ps -ef | grep mysqld
mysql     2884     1  1 Jan07 ?        00:14:41 /home/mysql/cluster_7_2_14/bin/mysqld --no-defaults
--datadir=/home/mysql/MySQL_Cluster/57/ --tmpdir=/home/mysql/MySQL_Cluster/57/tmp
--basedir=/home/mysql/cluster_7_2_14/ --port=3306 --ndbcluster --ndb-nodeid=57
--ndb-connectstring=192.168.56.101:1186,192.168.56.102:1186,
--socket=/home/mysql/MySQL_Cluster/57/mysql.socket
mysql     2981     1  1 Jan07 ?        00:14:42 /home/mysql/cluster_7_2_14/bin/mysqld --no-defaults
--datadir=/home/mysql/MySQL_Cluster/58/ --tmpdir=/home/mysql/MySQL_Cluster/58/tmp
--basedir=/home/mysql/cluster_7_2_14/ --port=3307 --ndbcluster --ndb-nodeid=58
--ndb-connectstring=192.168.56.101:1186,192.168.56.102:1186,
--socket=/home/mysql/MySQL_Cluster/58/mysql.socket

[mysql@connect13c ~]$ ps -ef | grep ndbmtd
mysql     1822     1 12 Jan07 ?        02:35:06 /home/mysql/cluster_7_2_14/bin/ndbmtd
--ndb-nodeid=1 --ndb-connectstring=192.168.56.101:1186,192.168.56.102:1186,
mysql     1823  1822 12 Jan07 ?        02:35:06 /home/mysql/cluster_7_2_14/bin/ndbmtd
--ndb-nodeid=1 --ndb-connectstring=192.168.56.101:1186,192.168.56.102:1186,

[mysql@connect13d ~]$ ps -ef | grep ndbmtd | grep nodeid=2
mysql     1835     1  0 Jan07 ?        00:00:52 /home/mysql/cluster_7_2_14/bin/ndbmtd
--ndb-nodeid=2 --ndb-connectstring=192.168.56.101:1186,192.168.56.102:1186,
mysql     1836  1835 12 Jan07 ?        02:30:46 /home/mysql/cluster_7_2_14/bin/ndbmtd
--ndb-nodeid=2 --ndb-connectstring=192.168.56.101:1186,192.168.56.102:1186,

[mysql@connect13a ~]$ cat /home/mysql/MySQL_Cluster/49/config.ini

# Configuration file for MyCluster
#

[NDB_MGMD DEFAULT]
Portnumber=1186

[NDB_MGMD]
NodeId=49
HostName=192.168.56.101
DataDir=/home/mysql/MySQL_Cluster/49/
Portnumber=1186

[NDB_MGMD]
NodeId=52
HostName=192.168.56.102
DataDir=/home/mysql/MySQL_Cluster/52/
Portnumber=1186

[TCP DEFAULT]
SendBufferMemory=4M
ReceiveBufferMemory=4M

[NDBD DEFAULT]
BackupMaxWriteSize=1M
BackupDataBufferSize=16M
BackupLogBufferSize=4M
BackupMemory=20M
BackupReportFrequency=10
MemReportFrequency=30
LogLevelStartup=15
LogLevelShutdown=15
LogLevelCheckpoint=8
LogLevelNodeRestart=15
DataMemory=58M
IndexMemory=9M
MaxNoOfTables=4096
MaxNoOfTriggers=3500
NoOfReplicas=2
StringMemory=25
DiskPageBufferMemory=64M
SharedGlobalMemory=20M
LongMessageBuffer=32M
MaxNoOfConcurrentTransactions=16384
BatchSizePerLocalScan=512
FragmentLogFileSize=64M
NoOfFragmentLogFiles=16
RedoBuffer=32M
MaxNoOfExecutionThreads=2
StopOnError=false
LockPagesInMainMemory=1
TimeBetweenEpochsTimeout=32000
TimeBetweenWatchdogCheckInitial=60000
TransactionInactiveTimeout=60000
HeartbeatIntervalDbDb=15000
HeartbeatIntervalDbApi=15000

[NDBD]
NodeId=1
HostName=192.168.56.103
DataDir=/home/mysql/MySQL_Cluster/1/

[NDBD]
NodeId=2
HostName=192.168.56.104
DataDir=/home/mysql/MySQL_Cluster/2/

[MYSQLD DEFAULT]

[MYSQLD]
NodeId=55
HostName=192.168.56.101

[MYSQLD]
NodeId=56
HostName=192.168.56.101

[MYSQLD]
NodeId=57
HostName=192.168.56.102

[MYSQLD]
NodeId=58
HostName=192.168.56.102

[API]
NodeId=50
HostName=192.168.56.101

[API]
NodeId=51
HostName=192.168.56.101

[API]
NodeId=53
HostName=192.168.56.102

[API]
NodeId=54
HostName=192.168.56.102
Now that we have a view of all of the configuration parameters, a subset of them need to be applied to the definition of the cluster in MCM (or else MCM will override them). Note that not all of the definitions need porting to MCM – for example Portnumber=1186 as that is already the default value and configdir as MCM will use its own. So, based on the command-line options provided to the executables and the configuration files, the configuration parameters for the cluster defined in MCM are set:
mcm> SET SendBufferMemory:ndbmtd+ndbmtd=4M,ReceiveBufferMemory:ndbmtd+ndbmtd=4M,
SendBufferMemory:ndbmtd+mysqld=4M,ReceiveBufferMemory:ndbmtd+mysqld=4M,BackupLogBufferSize:ndbmtd=4M,
BackupMemory:ndbmtd=20M,BackupReportFrequency:ndbmtd=10,MemReportFrequency:ndbmtd=30,
LogLevelStartup:ndbmtd=15,LogLevelShutdown:ndbmtd=15,LogLevelCheckpoint:ndbmtd=8,
LogLevelNodeRestart:ndbmtd=15,DataMemory:ndbmtd=58M,IndexMemory:ndbmtd=9M,MaxNoOfTables:ndbmtd=4096,
MaxNoOfTriggers:ndbmtd=3500,SharedGlobalMemory:ndbmtd=20M,LongMessageBuffer:ndbmtd=32M,
MaxNoOfConcurrentTransactions:ndbmtd=16384,BatchSizePerLocalScan:ndbmtd=512,
FragmentLogFileSize:ndbmtd=64M,StopOnError:ndbmtd=true,LockPagesInMainMemory:ndbmtd=1,
TimeBetweenEpochsTimeout:ndbmtd=32000,TimeBetweenWatchdogCheckInitial:ndbmtd=60000,
TransactionInactiveTimeout:ndbmtd=60000,HeartbeatIntervalDbDb:ndbmtd=15000,
HeartbeatIntervalDbApi:ndbmtd=15000,DataDir:ndbmtd:1=/home/mysql/MySQL_Cluster/1/,
DataDir:ndbmtd:2=/home/mysql/MySQL_Cluster/2/,DataDir:mysqld:55=/home/mysql/MySQL_Cluster/55/,
DataDir:mysqld:56=/home/mysql/MySQL_Cluster/56/,DataDir:mysqld:57=/home/mysql/MySQL_Cluster/57/,
DataDir:mysqld:58=/home/mysql/MySQL_Cluster/58/,tmpdir:mysqld:55=/home/mysql/MySQL_Cluster/55/tmp,
tmpdir:mysqld:56=/home/mysql/MySQL_Cluster/56/tmp,tmpdir:mysqld:57=/home/mysql/MySQL_Cluster/57/tmp,
tmpdir:mysqld:58=/home/mysql/MySQL_Cluster/58/tmp,
socket:mysqld:55=/home/mysql/MySQL_Cluster/55/mysql.socket,
socket:mysqld:56=/home/mysql/MySQL_Cluster/56/mysql.socket,
socket:mysqld:57=/home/mysql/MySQL_Cluster/57/mysql.socket,
socket:mysqld:58=/home/mysql/MySQL_Cluster/58/mysql.socket,port:mysqld:56=3307,
port:mysqld:58=3307 mycluster;

+-----------------------------------+
| Command result                    |
+-----------------------------------+
| Cluster reconfigured successfully |
+-----------------------------------+
1 row in set (0.44 sec)
Note that as MCM is not yet managing the running cluster, you can break this up into multiple SET commands as it doesn’t need to restart any processes.
As MCM takes over some functions from MySQL Cluster, we need to ensure that a couple of rules are imposed on the cluster so that there are no conflicts.
MCM is responsible for making sure that the management nodes are using the correct version of the configuration data and so we don’t want the management nodes holding onto older versions – this leads to the first rule, that the configuration cache should be disabled. This means restarting the management nodes with the config-cache parameter set to FALSE:
mysql@connect13a ~]$ ps -ef | grep ndb_mgmd
mysql     2766     1  2 Jan07 ?        00:34:27 /home/mysql/cluster_7_2_14/bin/ndb_mgmd --initial
--ndb-nodeid=49 --config-dir=/home/mysql/MySQL_Cluster/49/
--config-file=/home/mysql/MySQL_Cluster/49/config.ini
[mysql@connect13a ~]$ kill -9 2766
[mysql@connect13a ~]$  /home/mysql/cluster_7_2_14/bin/ndb_mgmd --initial --ndb-nodeid=49
--config-dir=/home/mysql/MySQL_Cluster/49/ --config-file=/home/mysql/MySQL_Cluster/49/config.ini
--config-cache=FALSE

[mysql@connect13b ~]$ ps -ef | grep ndb_mgmd
mysql     2426     1  2 Jan07 ?        00:32:26 /home/mysql/cluster_7_2_14/bin/ndb_mgmd --initial
--ndb-nodeid=52 --config-dir=/home/mysql/MySQL_Cluster/52/
--config-file=/home/mysql/MySQL_Cluster/52/config.ini
[mysql@connect13b ~]$ kill -9 2426
[mysql@connect13b ~]$  /home/mysql/cluster_7_2_14/bin/ndb_mgmd --initial --ndb-nodeid=52
--config-dir=/home/mysql/MySQL_Cluster/52/ --config-file=/home/mysql/MySQL_Cluster/52/config.ini
--config-cache=FALSE
MCM is responsible for making sure that a node is restarted in the event of the process stopping (only happens if StopOnError is set to FALSE) and so the data nodes no longer need their angel processes (the first of the 2 ndbmtd processes we see for each data node). This means the second rule is that all of these angel processes must be killed:
[mysql@connect13d ~]$ ps -ef | grep ndbmtd | grep nodeid=1
mysql     1822     1  0 Jan07 ?        00:00:52 /home/mysql/cluster_7_2_14/bin/ndbmtd --ndb-nodeid=1
--ndb-connectstring=192.168.56.101:1186,192.168.56.102:1186,
mysql     1823  1822 12 Jan07 ?        02:30:46 /home/mysql/cluster_7_2_14/bin/ndbmtd --ndb-nodeid=1
--ndb-connectstring=192.168.56.101:1186,192.168.56.102:1186,
[mysql@connect13d ~]$ kill -9 1822

[mysql@connect13d ~]$ ps -ef | grep ndbmtd | grep nodeid=2
mysql     1835     1  0 Jan07 ?        00:00:52 /home/mysql/cluster_7_2_14/bin/ndbmtd --ndb-nodeid=2
--ndb-connectstring=192.168.56.101:1186,192.168.56.102:1186,
mysql     1836  1835 12 Jan07 ?        02:30:46 /home/mysql/cluster_7_2_14/bin/ndbmtd --ndb-nodeid=2
--ndb-connectstring=192.168.56.101:1186,192.168.56.102:1186,
[mysql@connect13d ~]$ kill -9 1835
In order to manager the cluster, MCM needs to be able to connect to each of the MySQL Servers and so the mcmd user must be created on each of the MySQL Servers (unless you’re exploiting the ability to share user credentials between multiple MySQL Servers in which case it only needs doing once):
[mysql@connect13a ~]$ mysql -h 127.0.0.1 -P3306 -u root
Welcome to the MySQL monitor.  Commands end with ; or \g.
Your MySQL connection id is 5
Server version: 5.5.34-ndb-7.2.14-cluster-gpl MySQL Cluster Community Server (GPL)

Copyright (c) 2000, 2013, Oracle and/or its affiliates. All rights reserved.

Oracle is a registered trademarkshow  of Oracle Corporation and/or its
affiliates. Other names may be trademarks of their respective
owners.

Type 'help;' or '\h' for help. Type '\c' to clear the current input statement.

mysql> CREATE USER 'mcmd'@'%' IDENTIFIED BY 'super';
Query OK, 0 rows affected (0.01 sec)

mysql> GRANT ALL PRIVILEGES ON *.* TO 'mcmd'@'127.0.0.1' IDENTIFIED BY 'super' WITH GRANT OPTION;
Query OK, 0 rows affected (0.01 sec)

[mysql@connect13a ~]$ mysql -h 127.0.0.1 -P3307 -u root
Welcome to the MySQL monitor.  Commands end with ; or \g.
Your MySQL connection id is 5
Server version: 5.5.34-ndb-7.2.14-cluster-gpl MySQL Cluster Community Server (GPL)

Copyright (c) 2000, 2013, Oracle and/or its affiliates. All rights reserved.

Oracle is a registered trademarkshow  of Oracle Corporation and/or its
affiliates. Other names may be trademarks of their respective
owners.

Type 'help;' or '\h' for help. Type '\c' to clear the current input statement.

mysql> CREATE USER 'mcmd'@'%' IDENTIFIED BY 'super';
Query OK, 0 rows affected (0.01 sec)

mysql> GRANT ALL PRIVILEGES ON *.* TO 'mcmd'@'127.0.0.1' IDENTIFIED BY 'super' WITH GRANT OPTION;
Query OK, 0 rows affected (0.01 sec)

[mysql@connect13b ~]$ mysql -h 127.0.0.1 -P3306 -u root
Welcome to the MySQL monitor.  Commands end with ; or \g.
Your MySQL connection id is 5
Server version: 5.5.34-ndb-7.2.14-cluster-gpl MySQL Cluster Community Server (GPL)

Copyright (c) 2000, 2013, Oracle and/or its affiliates. All rights reserved.

Oracle is a registered trademarkshow  of Oracle Corporation and/or its
affiliates. Other names may be trademarks of their respective
owners.

Type 'help;' or '\h' for help. Type '\c' to clear the current input statement.

mysql> CREATE USER 'mcmd'@'%' IDENTIFIED BY 'super';
Query OK, 0 rows affected (0.01 sec)

mysql> GRANT ALL PRIVILEGES ON *.* TO 'mcmd'@'127.0.0.1' IDENTIFIED BY 'super' WITH GRANT OPTION;
Query OK, 0 rows affected (0.01 sec)

[mysql@connect13b ~]$ mysql -h 127.0.0.1 -P3307 -u root
Welcome to the MySQL monitor.  Commands end with ; or \g.
Your MySQL connection id is 5
Server version: 5.5.34-ndb-7.2.14-cluster-gpl MySQL Cluster Community Server (GPL)

Copyright (c) 2000, 2013, Oracle and/or its affiliates. All rights reserved.

Oracle is a registered trademarkshow  of Oracle Corporation and/or its
affiliates. Other names may be trademarks of their respective
owners.

Type 'help;' or '\h' for help. Type '\c' to clear the current input statement.

mysql> CREATE USER 'mcmd'@'%' IDENTIFIED BY 'super';
Query OK, 0 rows affected (0.01 sec)

mysql> GRANT ALL PRIVILEGES ON *.* TO 'mcmd'@'127.0.0.1' IDENTIFIED BY 'super' WITH GRANT OPTION;
Query OK, 0 rows affected (0.01 sec)
As the running cluster was generated by a pre-MySQL Cluster 7.3.3 version of the auto-installer, all of the mysqld settings were specified as command-line options. The MCM import command is very restrictive about what command-line options are allowed and so most of the options need moving to .cnf files and the the mysqld processes need to be restarted to use those configuration files (note that the cluster is still available through this process but there is a rolling restart of the MySQL Servers and so applications may need to switch ones they’re connected to temporarily – if this isn’t already handled by load ballancing). These are the configuration files that were manually created and the commands to restart each MySQL Server:
[mysql@connect13a ~]$ cat  /home/mysql/MySQL_Cluster/55.cnf
[mysqld]
tmpdir=/home/mysql/MySQL_Cluster/55/tmp
datadir=/home/mysql/MySQL_Cluster/55/
basedir=/home/mysql/cluster_7_2_14/
socket=/home/mysql/MySQL_Cluster/55/mysql.socket
port=3306
ndbcluster
ndb-nodeid=55
ndb-connectstring=192.168.56.101:1186,192.168.56.102:1186

[mysql@connect13a ~]$ mysqladmin -h 127.0.0.1 -P 3306 -u root shutdown
[mysql@connect13a ~]$ /home/mysql/cluster_7_2_14/bin/mysqld
--defaults-file=/home/mysql/MySQL_Cluster/55.cnf&

[mysql@connect13a ~]$ cat /home/mysql/MySQL_Cluster/56.cnf
[mysqld]
tmpdir=/home/mysql/MySQL_Cluster/56/tmp
datadir=/home/mysql/MySQL_Cluster/56/
basedir=/home/mysql/cluster_7_2_14/
socket=/home/mysql/MySQL_Cluster/56/mysql.socket
port=3307
ndbcluster
ndb-nodeid=56
ndb-connectstring=192.168.56.101:1186,192.168.56.102:1186

[mysql@connect13a ~]$ mysqladmin -h 127.0.0.1 -P 3307 -u root shutdown
[mysql@connect13a ~]$ /home/mysql/cluster_7_2_14/bin/mysqld
--defaults-file=/home/mysql/MySQL_Cluster/56.cnf&

[mysql@connect13b ~]$ cat /home/mysql/MySQL_Cluster/57.cnf
[mysqld]
tmpdir=/home/mysql/MySQL_Cluster/57/tmp
datadir=/home/mysql/MySQL_Cluster/57/
basedir=/home/mysql/cluster_7_2_14/
socket=/home/mysql/MySQL_Cluster/57/mysql.socket
port=3306
ndbcluster
ndb-nodeid=57
ndb-connectstring=192.168.56.101:1186,192.168.56.102:1186

[mysql@connect13b ~]$ mysqladmin -h 127.0.0.1 -P 3306 -u root shutdown
[mysql@connect13b ~]$ /home/mysql/cluster_7_2_14/bin/mysqld
--defaults-file=/home/mysql/MySQL_Cluster/57.cnf&

[mysql@connect13b ~]$ cat /home/mysql/MySQL_Cluster/58.cnf
[mysqld]
tmpdir=/home/mysql/MySQL_Cluster/58/tmp
datadir=/home/mysql/MySQL_Cluster/58/
basedir=/home/mysql/cluster_7_2_14/
socket=/home/mysql/MySQL_Cluster/58/mysql.socket
port=3307
ndbcluster
ndb-nodeid=58
ndb-connectstring=192.168.56.101:1186,192.168.56.102:1186

[mysql@connect13b ~]$ mysqladmin -h 127.0.0.1 -P 3307 -u root shutdown
[mysql@connect13b ~]$ /home/mysql/cluster_7_2_14/bin/mysqld
--defaults-file=/home/mysql/MySQL_Cluster/58.cnf&
MCM tracks each of the processes in the cluster using the process IDs held in pid files. For the data nodes, MCM will automatically fetch the process IDs from the pid files from the running cluster and so we need to make sure that they’re accurate (that they’re in the right place and contain the correct IDs):
[mysql@connect13c ~]$ ps -ef | grep ndbmtd
mysql     1823     1 12 Jan07 ?        02:35:06 /home/mysql/cluster_7_2_14/bin/ndbmtd
--ndb-nodeid=1 --ndb-connectstring=192.168.56.101:1186,192.168.56.102:1186,

[mysql@connect13c ~]$ echo 1823 > MySQL_Cluster/1/ndb_1.pid

[mysql@connect13d ~]$ ps -ef | grep ndbmtd
mysql     1836     1 12 Jan07 ?        02:34:03 /home/mysql/cluster_7_2_14/bin/ndbmtd
--ndb-nodeid=2 --ndb-connectstring=192.168.56.101:1186,192.168.56.102:1186,

[mysql@connect13d ~]$ echo 1836 > MySQL_Cluster/2/ndb_2.pid
For MySQL Servers and management nodes, the pid files need be created within the MCM directory:
[mysql@connect13a ~]$ ps -ef | grep mysqld
mysql    11145  1226  1 09:49 pts/1    00:00:02 /home/mysql/cluster_7_2_14/bin/mysqld
--defaults-file=/home/mysql/MySQL_Cluster/55.cnf
mysql    11178  1226  1 09:50 pts/1    00:00:01 /home/mysql/cluster_7_2_14/bin/mysqld
--defaults-file=/home/mysql/MySQL_Cluster/56.cnf

[mysql@connect13a ~]$ echo 11145 > mcm1.3/mcm_data/clusters/mycluster/pid/pid.55
[mysql@connect13a ~]$ echo 11178 > mcm1.3/mcm_data/clusters/mycluster/pid/pid.56

mysql@connect13b ~]$ ps -ef | grep mysqld
mysql     11247  8477  1 09:55 pts/1    00:00:03 /home/mysql/cluster_7_2_14/bin/mysqld
--defaults-file=/home/mysql/MySQL_Cluster/57.cnf
mysql     11253  8477  0 09:57 pts/1    00:00:01 /home/mysql/cluster_7_2_14/bin/mysqld
--defaults-file=/home/mysql/MySQL_Cluster/58.cnf

[mysql@connect13b ~]$ echo 11247 > mcm1.3/mcm_data/clusters/mycluster/pid/pid.57
[mysql@connect13b ~]$ echo 11253 > mcm1.3/mcm_data/clusters/mycluster/pid/pid.58

[mysql@connect13a pid]$ ps -ef | grep ndb_mgmd
mysql     8859     1  2 08:23 ?        00:00:23 /home/mysql/cluster_7_2_14/bin/ndb_mgmd --initial
--ndb-nodeid=49 --config-dir=/home/mysql/MySQL_Cluster/49/
--config-file=/home/mysql/MySQL_Cluster/49/config.ini --config-cache=FALSE

[mysql@connect13b ~]$ echo 8859 > mcm1.3/mcm_data/clusters/mycluster/pid/pid.49

[mysql@connect13b pid]$ ps -ef | grep ndb_mgmd
mysql     7092     1  1 08:25 ?        00:00:17 /home/mysql/cluster_7_2_14/bin/ndb_mgmd --initial
--ndb-nodeid=52 --config-dir=/home/mysql/MySQL_Cluster/52/
--config-file=/home/mysql/MySQL_Cluster/52/config.ini --config-cache=FALSE

[mysql@connect13b ~]$ echo 7092 > mcm1.3/mcm_data/clusters/mycluster/pid/pid.52
The good news is that if there are any mistakes in any of these files then the import cluster --dryrun command will fail with a useful error message and so you can come back to fix things up.
OK – you’ve now done the hard bits which is the prep work ahead of the actual importing of the cluster into MCM control, now it’s MCM’s turn to automate the actual install.
Before the real import, we use MCM to perform a dry-run to make sure that all of the prep work has been completed succesfully:
mcm> import cluster --dryrun mycluster;
+-------------------------------------------------+
| Command result                                  |
+-------------------------------------------------+
| Import checks passed. Cluster ready for import. |
+-------------------------------------------------+
1 row in set (0.80 sec)
All that’s left before running the final import is to take a backup (just in cas something should go very wrong):
mysql@connect13a ~]$ ndb_mgm
-- NDB Cluster -- Management Client --

ndb_mgm> start backup
Waiting for completed, this may take several minutes
Node 1: Backup 1 started from node 49
Node 1: Backup 1 started from node 49 completed
StartGCP: 35747 StopGCP: 35750
#Records: 2063 #LogRecords: 0
Data: 51472 bytes Log: 0 bytes
And now, finally the import itself can be run:
mcm> import cluster mycluster;
+-------------------------------+
| Command result                |
+-------------------------------+
| Cluster imported successfully |
+-------------------------------+
1 row in set (2.98 sec)
After all of the prep work, that seems a bit of an anticlimax! As a first check, make sure that all of the nodes (processes) have been imported correctly:
mcm> show status -r mycluster;
+--------+----------+-----------------+---------+-----------+---------+
| NodeId | Process  | Host            | Status  | Nodegroup | Package |
+--------+----------+-----------------+---------+-----------+---------+
| 49     | ndb_mgmd | 192.168.56.101  | running |           | 7_2_14  |
| 52     | ndb_mgmd | 192.168.56.102  | running |           | 7_2_14  |
| 1      | ndbmtd   | 192.168.56.103  | running | 0         | 7_2_14  |
| 2      | ndbmtd   | 192.168.56.104  | running | 0         | 7_2_14  |
| 55     | mysqld   | 192.168.56.101  | running |           | 7_2_14  |
| 56     | mysqld   | 192.168.56.101  | running |           | 7_2_14  |
| 57     | mysqld   | 192.168.56.102  | running |           | 7_2_14  |
| 58     | mysqld   | 192.168.56.102  | running |           | 7_2_14  |
| 50     | ndbapi   | *192.168.56.101 | added   |           |         |
| 51     | ndbapi   | *192.168.56.101 | added   |           |         |
| 53     | ndbapi   | *192.168.56.102 | added   |           |         |
| 54     | ndbapi   | *192.168.56.102 | added   |           |         |
+--------+----------+-----------------+---------+-----------+---------+
12 rows in set (0.10 sec)
As a second check, make sure that the data hasn’t been lost:
[mysql@connect13a ~]$ mysql -h 127.0.0.1 -P 3307 -u root -e 'SELECT * FROM clusterdb.simples'
+----+---------------------+
| id | time                |
+----+---------------------+
|  3 | 2014-01-07 12:08:40 |
|  5 | 2014-01-07 12:08:41 |
|  1 | 2014-01-07 12:08:38 |
|  2 | 2014-01-07 12:08:39 |
|  4 | 2014-01-07 12:08:41 |
+----+---------------------+
So that’s it, the cluster is now safely under the control of MCM. The next section performs some more tests of MCM and at the same time illustrates how much simpler some of these management steps are now we have MCM to help.
This final section shows how to exploit some of the MCM features on the cluster.
On-line backup and (especially) restore is very simple using MCM but before that can be done, we want to add extra ndbapi slots so that the restore command can be executed on the hosts running the data nodes – fortunately this is straight-forward to do:
mcm> add process -R ndbapi:59@192.168.56.103,ndbapi:60@192.168.56.104 mycluster;

+----------------------------+
| Command result             |
+----------------------------+
| Process added successfully |
+----------------------------+
1 row in set (2 min 32.91 sec)
Note that this process took more than 2 minutes – the reason for that is that behind the scenes it performed a rolling restart of all of the existing nodes (processes) to make them aware of the new nodes. We can now confirm that these nodes have been added:
mcm> show status -r mycluster;
+--------+----------+-----------------+---------+-----------+---------+
| NodeId | Process  | Host            | Status  | Nodegroup | Package |
+--------+----------+-----------------+---------+-----------+---------+
| 49     | ndb_mgmd | 192.168.56.101  | running |           | 7_2_14  |
| 52     | ndb_mgmd | 192.168.56.102  | running |           | 7_2_14  |
| 1      | ndbmtd   | 192.168.56.103  | running | 0         | 7_2_14  |
| 2      | ndbmtd   | 192.168.56.104  | running | 0         | 7_2_14  |
| 55     | mysqld   | 192.168.56.101  | running |           | 7_2_14  |
| 56     | mysqld   | 192.168.56.101  | running |           | 7_2_14  |
| 57     | mysqld   | 192.168.56.102  | running |           | 7_2_14  |
| 58     | mysqld   | 192.168.56.102  | running |           | 7_2_14  |
| 50     | ndbapi   | *192.168.56.101 | added   |           |         |
| 51     | ndbapi   | *192.168.56.101 | added   |           |         |
| 53     | ndbapi   | *192.168.56.102 | added   |           |         |
| 54     | ndbapi   | *192.168.56.102 | added   |           |         |
| 59     | ndbapi   | *192.168.56.103 | added   |           |         |
| 60     | ndbapi   | *192.168.56.104 | added   |           |         |
+--------+----------+-----------------+---------+-----------+---------+
14 rows in set (0.03 sec)
Taking a backup of the database is a single command:
mcm> backup cluster mycluster;
+-------------------------------+
| Command result                |
+-------------------------------+
| Backup completed successfully |
+-------------------------------+
1 row in set (5.76 sec)
Before performing the restore, the test data can be removed from the database:
[mysql@connect13a ~]$ mysql -h 127.0.0.1 -P 3307 -u root -e 'DELETE FROM clusterdb.simples'
To restore the database, check the available backups and then restore the most recent one (note as only the data has been deleted, the -M option is used to indicate that meta-data doesn’t need to be restored). The -I option is used to specify that the backup with Id of 2 should be used:
mcm> list backups mycluster;
+----------+--------+----------------+---------------------+---------+
| BackupId | NodeId | Host           | Timestamp           | Comment |
+----------+--------+----------------+---------------------+---------+
| 1        | 1      | 192.168.56.103 | 2014-01-08 08:31:35 |         |
| 1        | 2      | 192.168.56.104 | 2014-01-08 08:31:33 |         |
| 2        | 1      | 192.168.56.103 | 2014-01-09 05:03:13 |         |
| 2        | 2      | 192.168.56.104 | 2014-01-09 05:03:12 |         |
+----------+--------+----------------+---------------------+---------+
4 rows in set (0.19 sec)

mcm> restore cluster -I 2 -M mycluster;
+--------------------------------+
| Command result                 |
+--------------------------------+
| Restore completed successfully |
+--------------------------------+
1 row in set (9.40 sec)
To confirm that the restore has indeed been successful, check that the test data is back in the database:
[mysql@connect13a ~]$ mysql -h 127.0.0.1 -P 3307 -u root -e 'SELECT * FROM clusterdb.simples'
+----+---------------------+
| id | time                |
+----+---------------------+
|  3 | 2014-01-07 12:08:40 |
|  5 | 2014-01-07 12:08:41 |
|  1 | 2014-01-07 12:08:38 |
|  2 | 2014-01-07 12:08:39 |
|  4 | 2014-01-07 12:08:41 |
+----+---------------------+
As a final test, the cluster is upgraded to MySQL Cluster 7.3.3; all that’s needed is to define the package (telling MCM where to find the new binaries on the target hosts) and then perform the upgrade:
mcm> add package --basedir=/home/mysql/mcm1.3_cluster/cluster 7_3_3;
+----------------------------+
| Command result             |
+----------------------------+
| Package added successfully |
+----------------------------+
1 row in set (0.65 sec)

mcm> upgrade cluster --package=7_3_3 mycluster;
+-------------------------------+
| Command result                |
+-------------------------------+
| Cluster upgraded successfully |
+-------------------------------+
1 row in set (4 min 15.96 sec)
The most demanded feature for MySQL Cluster Manager was the ability to take an existing (running) cluster and bring it under the control of MCM (rather than having to create the cluster using MCM in the first place). MCM 1.3 delivers this. As you’ll have noticed, the migration process involves a non-trivial amount of prep work; the reason for this is that making configuration changes to cluster is fairly involved, with a lot of moving parts. Hopefully you’ll also have obderved that once the cluster is under the control of MCM, the management process becomes much simpler and less prone to user error.
It would be great to hear how people get on with MCM 1.3 in general and with the import in particular, please download the MySQL Cluster Manager software and try it out.
 The latest (GA) version of MySQL Cluster Manager is available through Oracle’s E-Delivery site. You can download the software and try it out for yourselves (just select “MySQL Database” as the product pack, select your platform, click “Go” and then scroll down to get the software).
If you’ve looked at MCM in the past then the first thing that you’ll notice is that it’s now much simpler to get it up and running – in particular the configuration and running of the agent has now been reduced to just running a single executable (called "mcmd").
The second change is that you can now stop the MCM agents from within the MCM CLI – for example "stop agents mysite" will safely stop all of the agents running on the hosts defined by "mysite".
Those 2 changes make it much simpler for the novice user to get up and running quickly; for the more expert user, the most signifficant change is that MCM can now manage multiple clusters.
Obviously, there are a bunch of more minor changes as well as bug fixes.
MySQL Cluster Manager provides the ability to control the entire cluster as a single entity, while also supporting very granular control down to individual processes within the cluster itself. Administrators are able to create and delete entire clusters, and to start, stop and restart the cluster with a single command. As a result, administrators no longer need to manually restart each data node in turn, in the correct sequence, or to create custom scripts to automate the process.
MySQL Cluster Manager automates on-line management operations, including the upgrade, downgrade and reconfiguration of running clusters as well as adding nodes on-line for dynamic, on-demand scalability, without interrupting applications or clients accessing the database. Administrators no longer need to manually edit configuration files and distribute them to other cluster nodes, or to determine if rolling restarts are required. MySQL Cluster Manager handles all of these tasks, thereby enforcing best practices and making on-line operations significantly simpler, faster and less error-prone.
MySQL Cluster Manager is able to monitor cluster health at both an Operating System and per-process level by automatically polling each node in the cluster. It can detect if a process or server host is alive, dead or has hung, allowing for faster problem detection, resolution and recovery.
To deliver 99.999% availability, MySQL Cluster has the capability to self-heal from failures by automatically restarting failed Data Nodes, without manual intervention. MySQL Cluster Manager extends this functionality by also monitoring and automatically recovering SQL and Management Nodes.

MySQL Cluster Manager Architecture
MySQL Cluster Manager is implemented as a series of agent processes that co-operate with each other to manage the MySQL Cluster deployment; one agent running on each host machine that will be running a MySQL Cluster node (process). The administrator uses the regular mysql command to connect to any one of the agents using the port number of the agent (defaults to 1862 compared to the MySQL Server default of 3306).
When using MySQL Cluster Manager to manage your MySQL Cluster deployment, the administrator no longer edits the configuration files (for example config.ini and my.cnf); instead, these files are created and maintained by the agents. In fact, if those files are manually edited, the changes will be overwritten by the configuration information which is held within the agents. Each agent stores all of the cluster configuration data, but it only creates the configuration files that are required for the nodes that are configured to run on that host.
Similarly when using MySQL Cluster Manager, management actions must not be performed by the administrator using the ndb_mgm command (which directly connects to the management node meaning that the agents themselves would not have visibility of any operations performed with it).
When using MySQL Cluster Manager, the ‘angel’ processes are no longer needed (or created) for the data nodes, as it becomes the responsibility of the agents to detect the failure of the data nodes and recreate them as required. Additionally, the agents extend this functionality to include the management nodes and MySQL Server nodes.
On each host that will run Cluster nodes, install the MCM agent. To do this, just download the zip file from Oracle E-Delivery and then extract the contents into a convenient location:
$ unzip V27167-01.zip
$ tar xf mysql-cluster-manager-1.1.1-linux-rhel5-x86-32bit.tar.gz
$ mv mysql-cluster-manager-1.1.1-linux-rhel5-x86-32bit ~/mcm
Starting the agent is then trivial (remember to reapeat on each host though):
$ cd ~/mcm
$ bin/mcmd&
Next, some examples of how to use MCM.
The first step is to connect to one of the agents and then define the set of hosts that will be used for the Cluster:
$ mysql -h 192.168.0.10 -P 1862 -u admin -psuper --prompt='mcm> '
mcm> create site --hosts=192.168.0.10,192.168.0.11,192.168.0.12,192.168.0.13 mysite;
Next step is to tell the agents where they can find the Cluster binaries that are going to be used, define what the Cluster will look like (which nodes/processes will run on which hosts) and then start the Cluster:
mcm> add package --basedir=/usr/local/mysql_6_3_27a 6.3.27a;
mcm> create cluster --package=6.3.26 --processhosts=ndb_mgmd@192.168.0.10,ndb_mgmd@192.168.0.11,
  ndbd@192.168.0.12,ndbd@192.168.0.13,ndbd@192.168.0.12, ndbd@192.168.0.13,mysqld@192.168.0.10,
  mysqld@192.168.0.11 mycluster;
mcm> start cluster mycluster;
A great example of how MySQL Cluster Manager can simplify management operations is upgrading the Cluster software. If performing the upgrade by hand then there are dozens of steps to run through which is time consuming, tedious and subject to human error (for example, restarting nodes in the wrong order could result in an outage). With MySQL Cluster Manager, it is reduced to two commands – define where to find the new version of the software and then perform the rolling, in-service upgrade:
mcm> add package --basedir=/usr/local/mysql_7_1_8 7.1.8;
mcm> upgrade cluster --package=7.1.8 mycluster;
Behind the scenes, each node will be halted and then restarted with the new version – ensuring that there is no loss of service.

Automated On-Line Add-Node
Since MySQL Cluster 7.0 it has been possible to add new nodes to a Cluster while it is still in service; there are a number of steps involved and as with on-line upgrades if the administrator makes a mistake then it could lead to an outage.
We’ll now look at how this is automated when using MySQL Cluster Manager; the first step is to add any new hosts (servers) to the site and indicate where those hosts can find the Cluster software:
mcm> add hosts --hosts=192.168.0.14,192.168.0.15 mysite;
mcm> add package --basedir=/usr/local/mysql_7_1_8
  --hosts=192.168.0.14,192.168.0.15 7_1_8;
The new nodes can then be added to the Cluster and then started up:
mcm> add process --processhosts=mysqld@192.168.0.10,mysqld@192.168.0.11,ndbd@192.168.0.14,
  ndbd@192.168.0.15,ndbd@192.168.0.14,ndbd@192.168.0.15 mycluster;
mcm> start process --added mycluster;
The Cluster has now been extended but you need to perform a final step from any of the MySQL Servers to repartition the existing Cluster tables to use the new data nodes:
mysql> ALTER ONLINE TABLE <table-name> REORGANIZE PARTITION;
mysql> OPTIMIZE TABLE <table-name>;
There is a lot of extra information to help you understand what can be achieved with MySQL Cluster Manager and how to use it: