From the start, Stitch has been great at serving up dynamic content and interacting with backend services. There was just one piece missing that meant that you still needed an app server or hosting service – storing and serving up your static assets (index.html, style.css, logo.png, etc.). The recent addition of Stitch Hosting, currently in beta, fixes that!
Following the dogfooding principle, I decided to try porting one of my existing websites to Stitch (the site is for renting out our holiday home). Now, this isn’t some newfangled website with all the latest bells and whistles. I’d built the original site before the serverless and mobile-first movements took off; using PHP in the backend and JavaScript/JQuery in the frontend. The vast majority of the porting effort went into replacing the backend PHP code with frontend JavaScript. Once that was done, porting it to Stitch was a breeze.
Step 1 was to enable Hosting through the Stitch UI and upload the (907) static files. You can upload all the files manually through the UI, but here’s a pro-tip, you can perform a bulk upload using the Stitch CLI:
stitch-cli import --include-hosting --strategy=replace
When I made further edits, I used the Stitch UI to upload the modified files:

When users submitted forms on the original site, I was sent an email via GoDaddy’s temperamental gdform.php script (which writes the data to a local file, which GoDaddy’s cron job may eventually process to send the email), and I was looking forward to ripping that out and using Stitch QueryAnywhere instead. The frontend code to store the data in MongoDB is straightforward:
function addBooking (booking) {
    const client = stitch.Stitch.initializeDefaultAppClient('oleronvilla-xxxxx');
    const db = client.getServiceClient(stitch.RemoteMongoClient.factory,
        'mongodb-atlas').db('oleron');
    const collection = db.collection('bookings');

    return client.auth.loginWithCredential(
            new stitch.AnonymousCredential()).then(user => {
        return collection.insertOne({owner_id: client.auth.user.id,
                                    bookingRequest: booking})
            .catch(err => console.error(err.message))});
}
So that safely stores the user-submitted data in MongoDB. The next step was to bring the site into the 1990s by having it send me a text message with the submitted data. I could have gone back to the frontend code to send the data to a Stitch Function (in addition to writing it to Atlas), but, as my legacy frontend code is somewhat ‘fragile’, I prefer to make as few changes there as possible. Stitch Triggers to the rescue! I created a new Stitch Function (textReservation) to send the form data to Twilio:
exports = function(event) {
    const twilio = context.services.get("TwilioText");
    const request = event.fullDocument.bookingRequest;
    const body = "New booking from "
      + request.name.first + " " + request.name.last
      + " for these weeks: " + request.requestedDates.toString() + ". "
      + "Call on " + request.contact.phone
      + " or email " + request.contact.email + ". "
      + "Comment: " + request.comments;
    twilio.send({
        to: context.values.get("phoneNumber"),
        from: context.values.get("twilioNumber"),
        body: body
    });
};
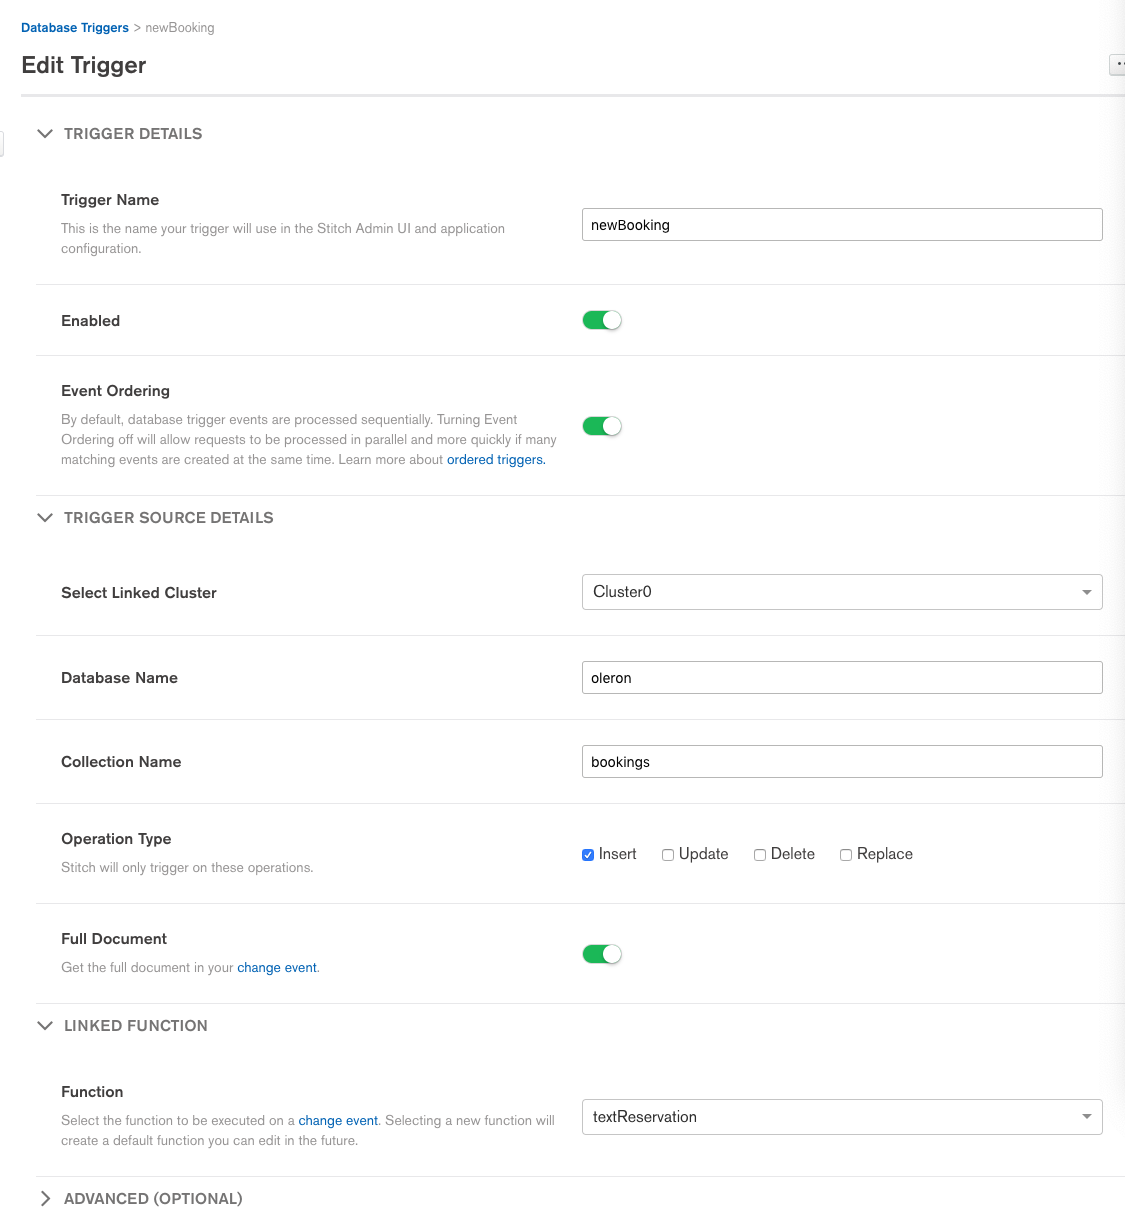
The final step was to link this function to a Stitch Trigger which fires whenever Stitch QueryAnywhere adds a new document to the oleron.bookings collection:
Note that I used the Stitch option to bring my own domain name. See the results at stitch.oleronvilla.com, but please don’t judge my code!
Creating your first Stitch app? Start with one of the Stitch tutorials.
Want to learn more about MongoDB Stitch? Read the white paper.